After setting up the blog I decided I would store and distribute the site’s media (photos and potentially future videos) from a different place than Netlify. I didn’t want all my media files in a git repository, making Netlify transfer megabytes and gigabytes everytime I commit a change. But I also didn’t want to necessarily have all the files uploaded to wherever my media repository was before I started the post, as I would experiment with different pictures during the writing, or changing all of the image URLs manually once I got the draft ready. So I needed an auto-switching system that could take care of that for me.
Amazon S3 and Cloudfront
Before we get to the how, I need to go through the where. After reading a lot, specially Stammy’s Getting Started with Amazon CloudFront how-to post, I decided on going the Amazon S3 plus Cloudfront way. It’s relatively cheap and they have a 12 months free tier where you get 5GB of storage in S3 and 50 GB of transfer out data or 2,000,000 requests per month. I call it a bargain for you to start and test it out!
AWS Free Usage Tier
As part of the AWS Free Tier, you can get started with Amazon S3 for free. Upon sign-up, new AWS customers receive 5GB of Amazon S3 storage in the S3 Standard storage class; 20,000 GET Requests; 2,000 PUT, COPY, POST, or LIST Requests; and 15GB of Data Transfer Out each month for one year.
As part of the AWS Free Usage Tier, you can get started with Amazon CloudFront for free. Upon sign-up, new AWS customers receive 50 GB Data Transfer Out and 2,000,000 HTTP and HTTPS Requests each month for one year.
Your usage for the free tier is calculated each month, is aggregated across all AWS edge locations, and is automatically applied to your bill – unused monthly usage will not roll over. Restrictions apply; see offer terms for more details.
After one year costs are pretty minimal, specially if you’re just starting.
- S3 Storage costs of $0.023 per GB for your first 50 TB of data
- Transfer costs between S3 and Cloudfront are free
- Cloudfront Transfer costs are $0.085 per GB for your first 10 TB of data
Shortcodes
Live distribution worked out. With media uploaded to S3, Cloudfront was serving my pictures fast and reliably. But how do I write my draft posts without the need to upload everything to S3 beforehand, or doing it while I’m writting? I often test out different pictures, or just use unedited versions for layouting, and just after that edit final versions. So uploading and reuploading dozens of times during the writing process would become too cumbersome to go through.
Hugo shortcodes for the rescue! I had already read how powerful they could be, so I decided to give it a try.
What I wanted was to just drop my media in a draft folder in my disk while I’m writing the post and being able to see it while running Hugo Server in draft mode, styling it and making adjustments when needed. Once the post is done I would upload the entire media folder to S3, change the post to live and everything would work fine.
In my hugo folder structure, I’ve created a media-drafts folder inside of the static one, and I use it to store all my media. The folder is itself structured as my content one is: subfolders for the posts and photos categories, and then a folder for each actual post.
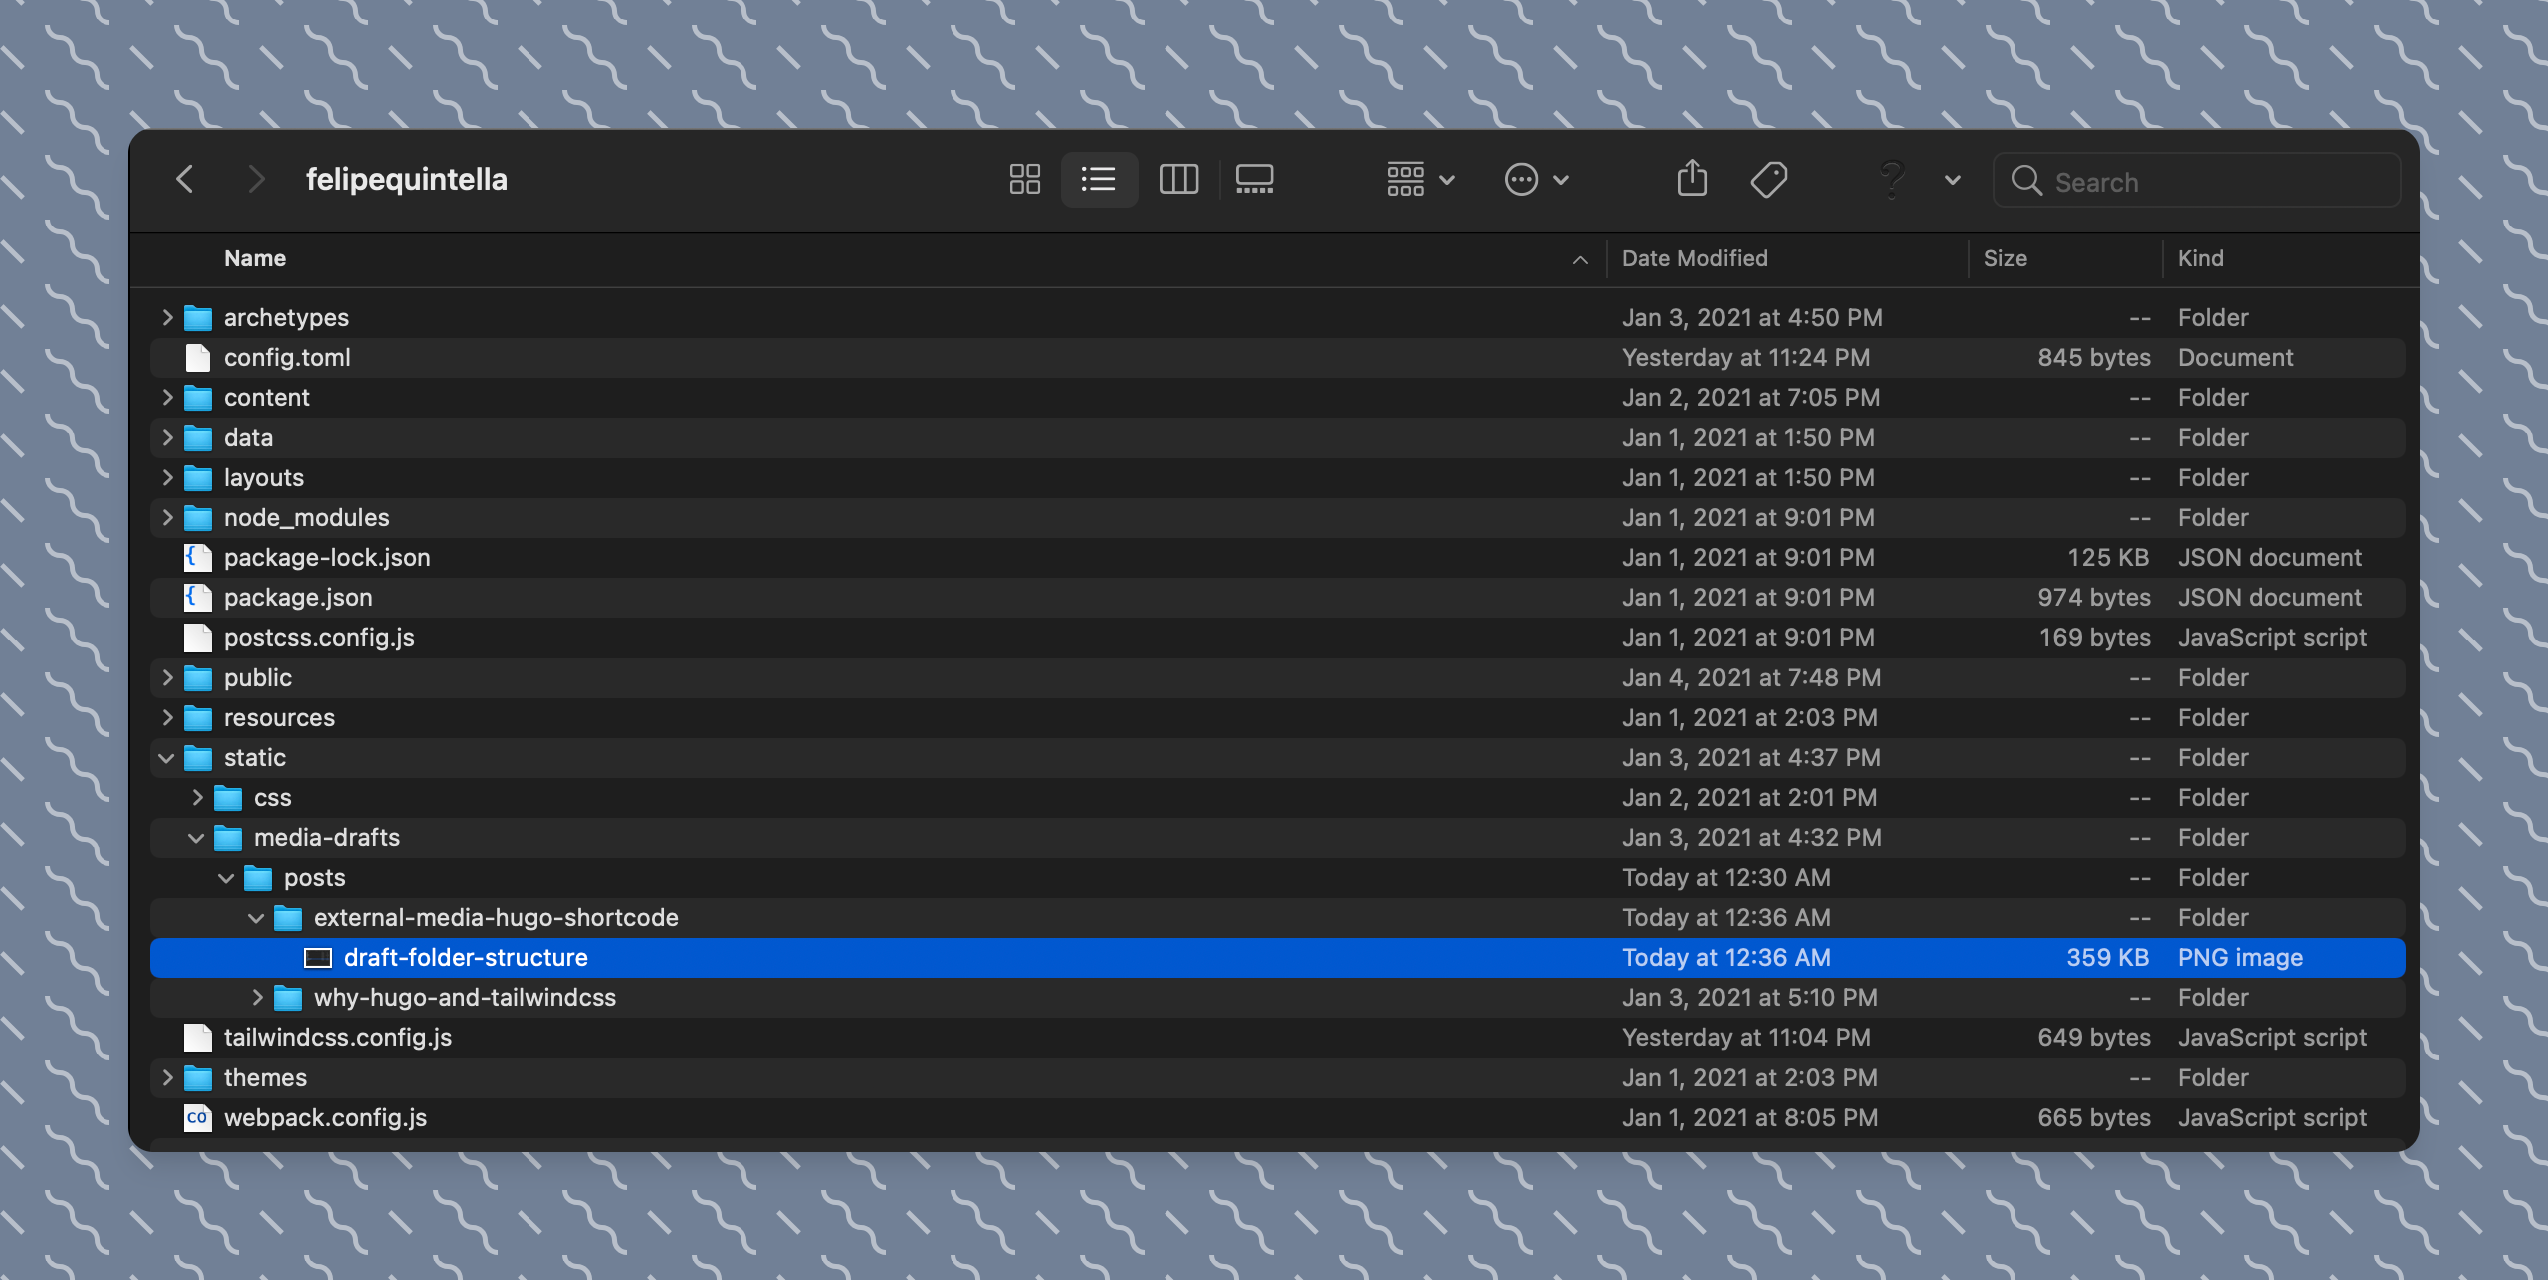
Ideal placement and folder structure for draft post media
Having the media folder inside of static means Hugo can easily serve from it while in development server mode
Hugo Content Management
Static Files
Files that get served statically (as-is, no modification) on the site root.
By default, the static/ directory in the site project is used for all static files (e.g. stylesheets, JavaScript, images). The static files are served on the site root path (eg. if you have the file static/image.png you can access it using http://{server-url}/image.png, to include it in a document you can use ).
So, to make this work I just need an automated way to change each image’s url from the media-drafts folder at the root of the site, to the Cloudfront server in production.
For this, I created a media shortcode that I use in every image I need to include in my posts. It also has a few parameters you can define when using the shortcode:
- src: the actual filename for the image you are including, no path necessary
- class: to define the figure class so that it can be stylized and modified by your design/css
- title: to define a title for your picture that will be output as an h4 tag
- caption: to define a caption for your picture, shown as a p tag. Can be used in conjuction with a title
- alt: to define the alternate text for an image, if the image cannot be displayed
- link: if you want the image to also be a hyperlink, you can include the href value here
Draft or Live
First thing we need to do is figure out if the post being rendered is in draft mode or already set for live. We do it through the Page.Params.draft parameter, from the post’s front matter. If the draft parameter is true, we generate an url variable that points to the media-drafts folder, and if it is false we generate the url variable pointing to the Cloudfront distribution address. In both cases we use the Page.Type and Page.Params.Slug to target the url to the post folder, and finally the src shortcode parameter to get the image filename.
{{ $url := "" }}
{{ if $.Page.Params.draft }}
    {{ $url = (printf "%s%s" (printf "%s%s%s%s%s" "/media-drafts/" $.Page.Type "/" $.Page.Params.Slug "/" | urlize) (.Get "src")) }}
{{ else }}
    {{ $url = (printf "%s%s" (printf "%s%s" "https://turbo.felipequintella.com/uploads/" (printf "%s%s%s%s" $.Page.Type "/" $.Page.Params.Slug "/" | urlize)) (.Get "src")) }}
{{ end }}
I’ll use the url variable as the <img> src parameter. And this is the main part of it. After that, we simply use the rest of the shortcodes parameters to build the entire Figure tag.
Other Shortcode Parameters
To include a hyperlink I look for the link parameter and create an <a> tag if it is present.
{{ with .Get "link"}}<a href="{{.}}">{{ end }}
    <img src="{{ $url }}" />
{{ if .Get "link"}}</a>{{ end }}
I’ll also use the alt parameter for the alternative text, or the caption in case the user has not included an alt.
<img src="{{ $url }}" {{ if or (.Get "alt") (.Get "caption") }}alt="{{ with .Get "alt"}}{{.}}{{else}}{{ .Get "caption" }}{{ end }}"{{ end }} />
Below the image I’ll include a title and/or a caption, and also make sure to have the figure class if the user has defined one.
{{ if or (or (.Get "title") (.Get "caption")) (.Get "attr")}}
    <figcaption class="text-sm font-light">{{ if isset .Params "title" }}
        <h4>{{ .Get "title" }}</h4>{{ end }}
        {{ if or (.Get "caption") (.Get "attr")}}<p>
        {{ .Get "caption" }}
        {{ with .Get "attrlink"}}<a href="{{.}}"> {{ end }}
            {{ .Get "attr" }}
        {{ if .Get "attrlink"}}</a> {{ end }}
        </p> {{ end }}
    </figcaption>
{{ end }}
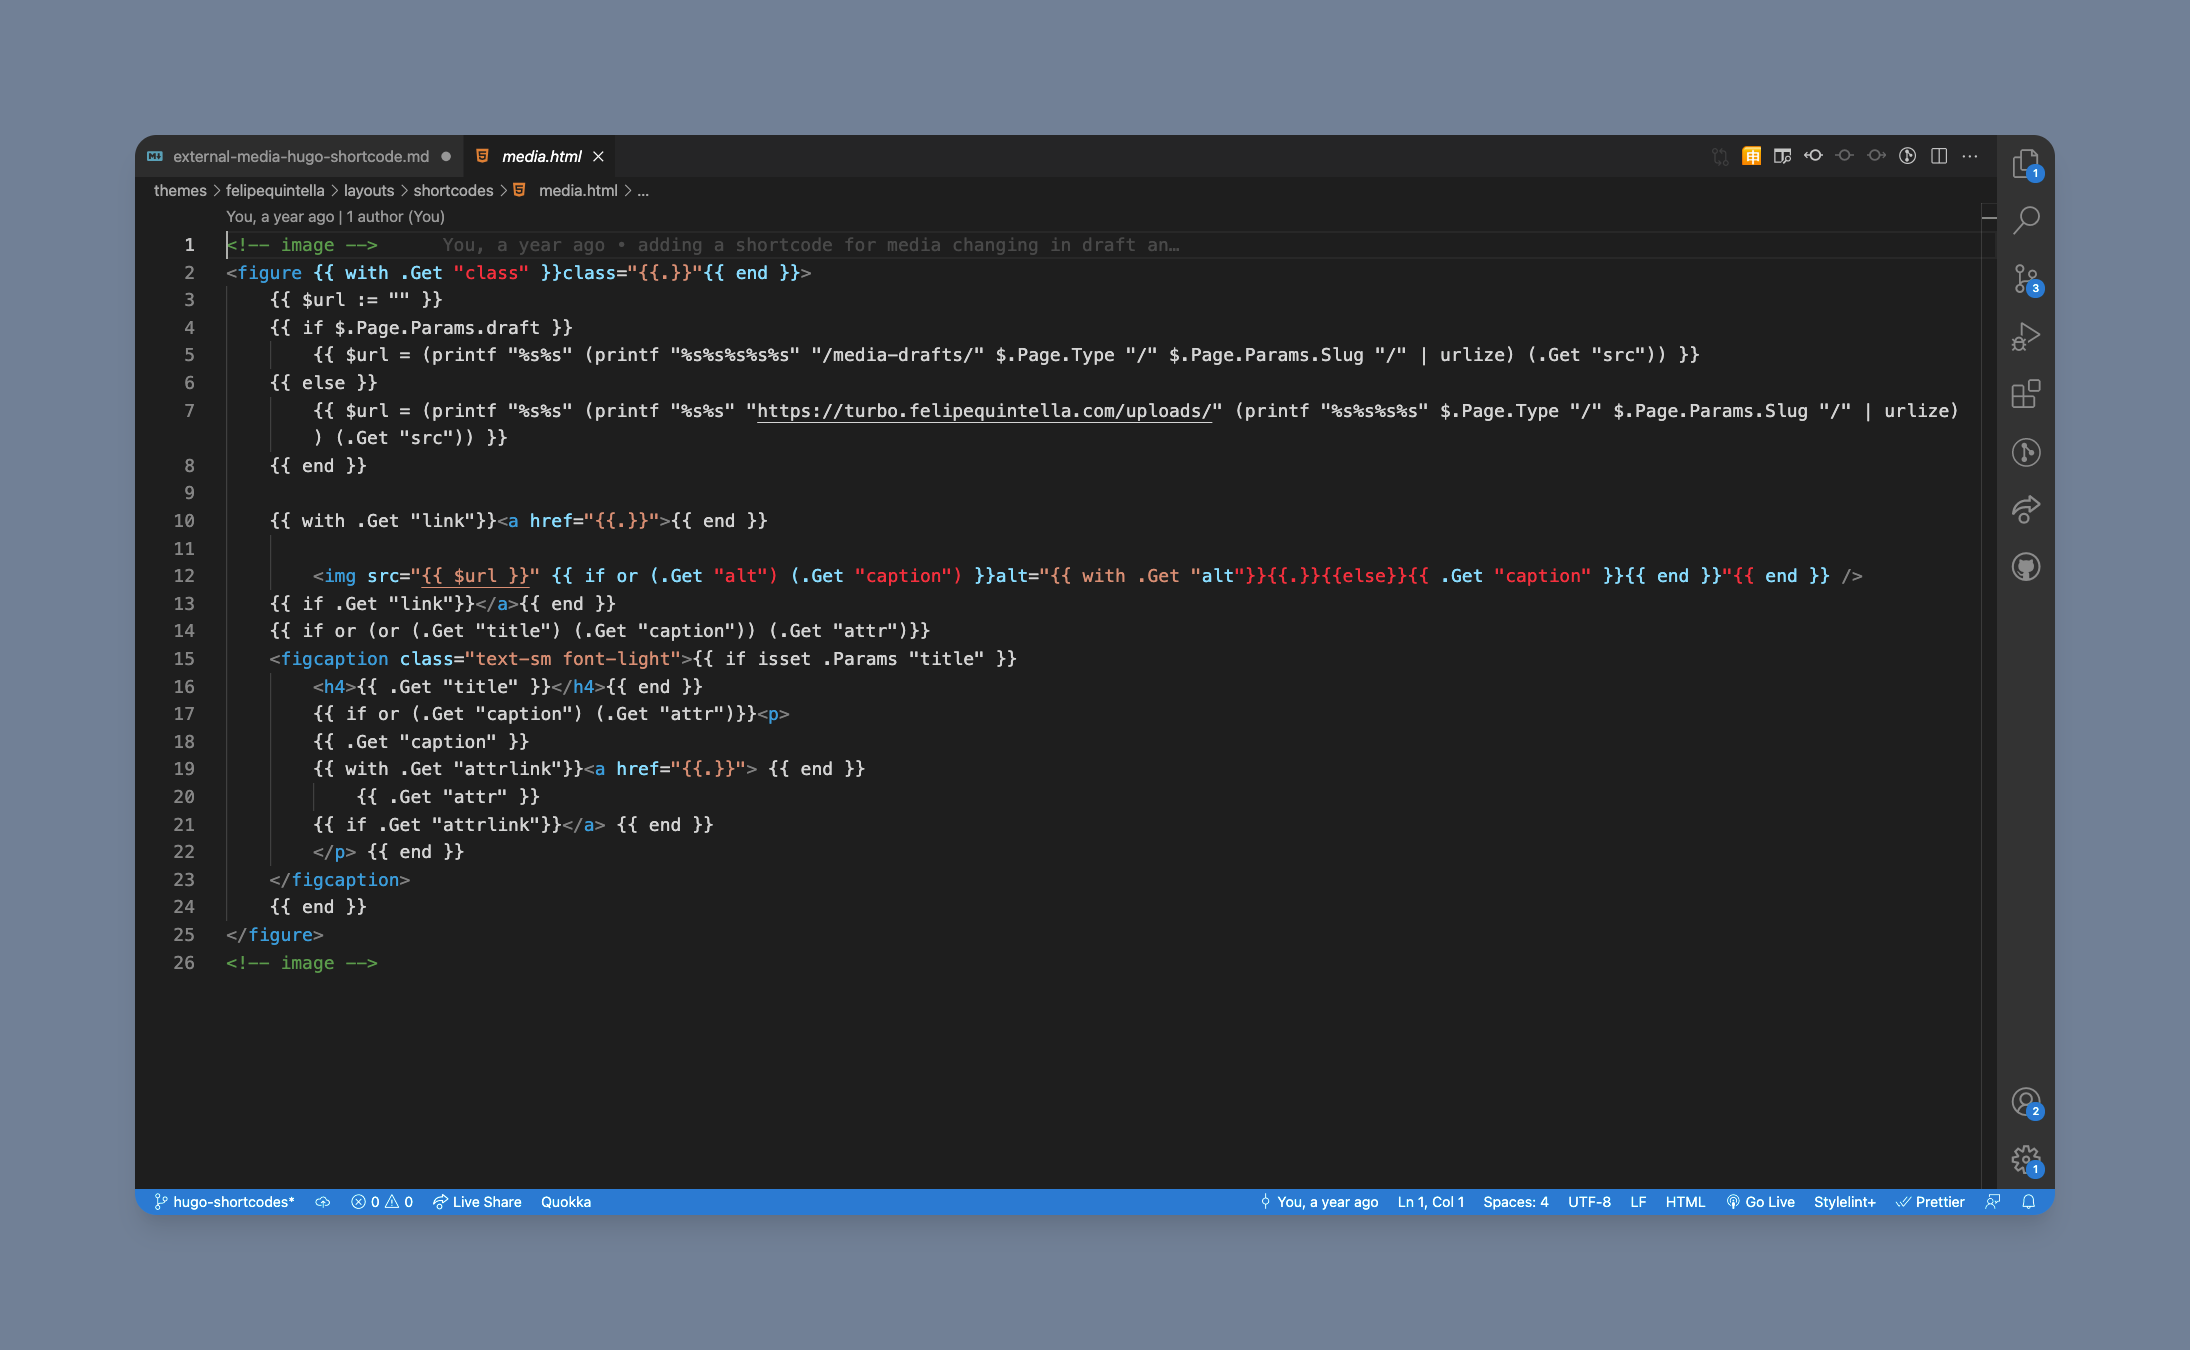
Final shortcode
To sum up, this is the final shortcode. It works amazingly, and is pretty simple. I don’t have to worry about re-writting my image sources everytime I publish a post, and I can freely work in my own local machine.
<!-- image -->
<figure {{ with .Get "class" }}class="{{.}}"{{ end }}>
    {{ $url := "" }}
    {{ if $.Page.Params.draft }}
        {{ $url = (printf "%s%s" (printf "%s%s%s%s%s" "/media-drafts/" $.Page.Type "/" $.Page.Params.Slug "/" | urlize) (.Get "src")) }}
    {{ else }}
        {{ $url = (printf "%s%s" (printf "%s%s" "https://turbo.felipequintella.com/uploads/" (printf "%s%s%s%s" $.Page.Type "/" $.Page.Params.Slug "/" | urlize)) (.Get "src")) }}
    {{ end }}

    {{ with .Get "link"}}<a href="{{.}}">{{ end }}
        <img src="{{ $url }}" {{ if or (.Get "alt") (.Get "caption") }}alt="{{ with .Get "alt"}}{{.}}{{else}}{{ .Get "caption" }}{{ end }}"{{ end }} />
    {{ if .Get "link"}}</a>{{ end }}

    {{ if or (or (.Get "title") (.Get "caption")) (.Get "attr")}}
    <figcaption class="text-sm font-light">{{ if isset .Params "title" }}
        <h4>{{ .Get "title" }}</h4>{{ end }}
        {{ if or (.Get "caption") (.Get "attr")}}<p>
        {{ .Get "caption" }}
        {{ with .Get "attrlink"}}<a href="{{.}}"> {{ end }}
            {{ .Get "attr" }}
        {{ if .Get "attrlink"}}</a> {{ end }}
        </p> {{ end }}
    </figcaption>
    {{ end }}
</figure>
<!-- image -->
Home page and other locations
Of course, when you’re writing your draft post, your cover image also shows up. On this case, I have made an auto-switching piece that does pretty much the same as the shortcode above.
I’ll check if the post is a Draft or not, change the image’s source accordingly, and create the image. On my index page I’ve even included a visual DRAFT flag to show me which posts are still unfinished. It’s a visual reminder I still have work to do!
{{ $image := .Params.coverimage}}
{{ with $image }}
    {{ $url := "" }}
    {{ if $page.Draft }}
        {{ $url = (printf "%s%s" (printf "%s%s%s%s%s" "/media-drafts/" $page.Type "/" $page.Slug "/" | urlize) .) }}
    {{ else }}
        {{ $url = (printf "%s%s" (printf "%s%s" "https://turbo.felipequintella.com/uploads/" (printf "%s%s%s%s" $page.Type "/" $page.Slug "/" | urlize)) .) }}
    {{ end }}
    <figure class="photoset-item">
        <img data-src="{{ $url }}" class="w-full rounded-xl mb-3 md:mb-6">
    </figure>
{{ end }}

{{ if .Draft }}<span class="font-bold text-gray-300 text-base" draft=true>DRAFT</span>{{end}}
<h2 class="text-green-700 text-2xl">{{ .Title | markdownify }}</h2>
It looks really good, and the Draft flag pops out to show me where I need to work on
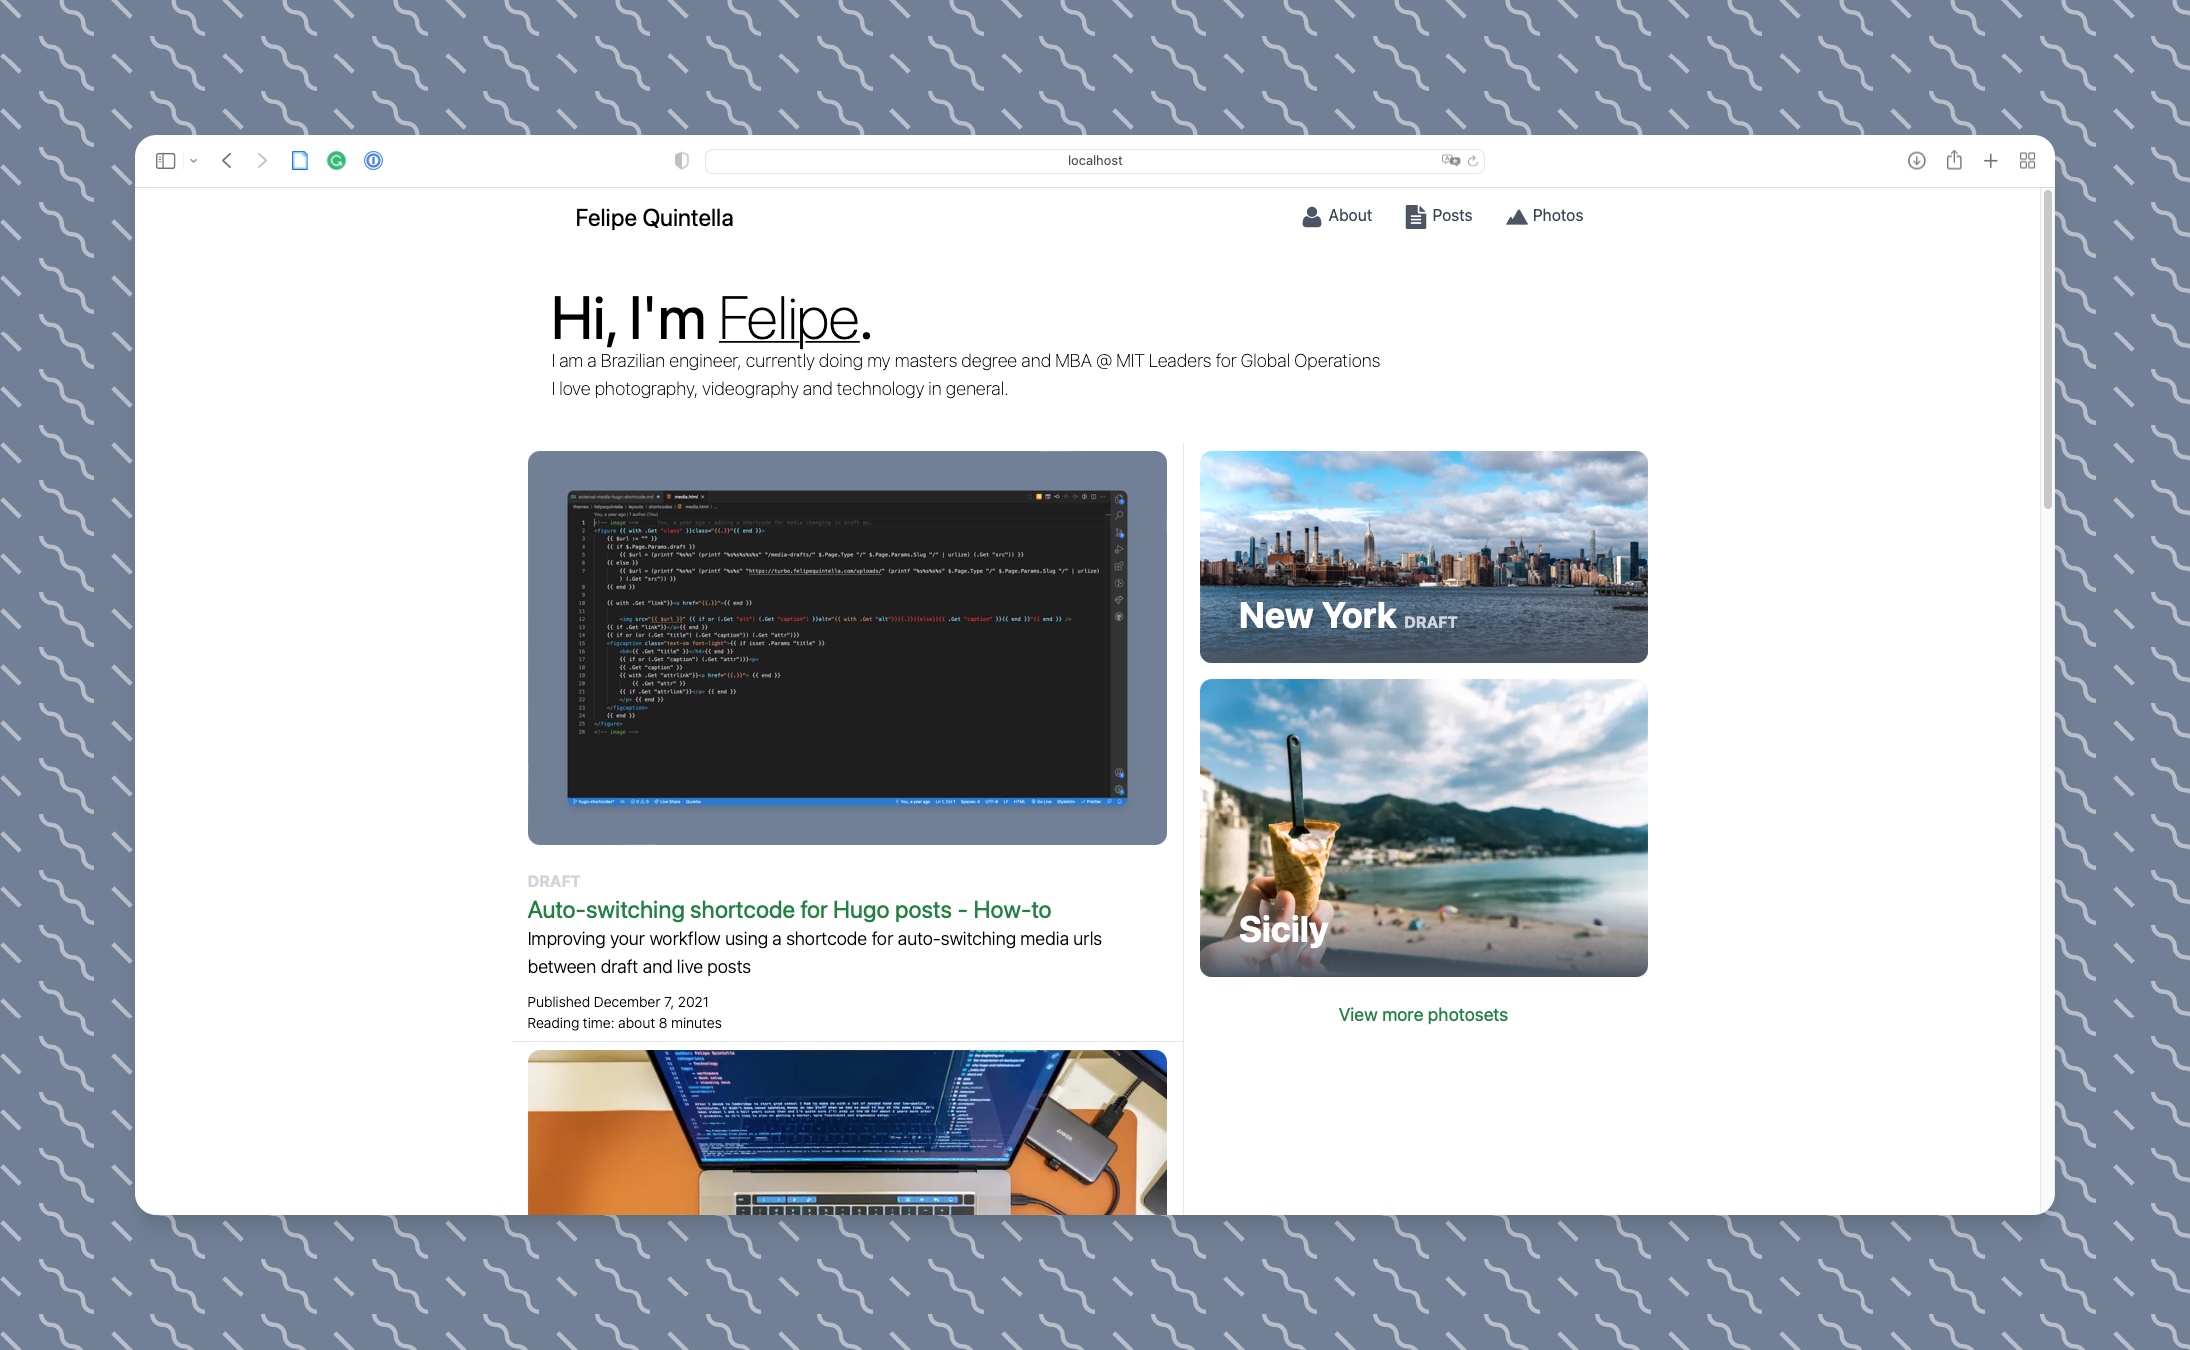
My home page showing draft posts with cover images appearing and Draft flags. You can also see my under-work New York photo gallery with the nice Draft flag on it

The posts listing also shows draft cover images and Draft flags
Conclusion
I hope this has showed you the power that a Hugo shortcode can have. It will streamline your workflow and help getting those posts out! I know I am guilty myself of not writting, but I’m getting back in the game, so let’s see!
Catch you next time.