I previously wrote a post on how important backups are and how I lost 34,766 photos in 2012. By now I have accumulated 59,917 more photos and have been through many different workflows while traveling and at home with regard to photo management. I want to share what is currently working for me and how I deal with so many photos, storing, editing, sharing, etc.
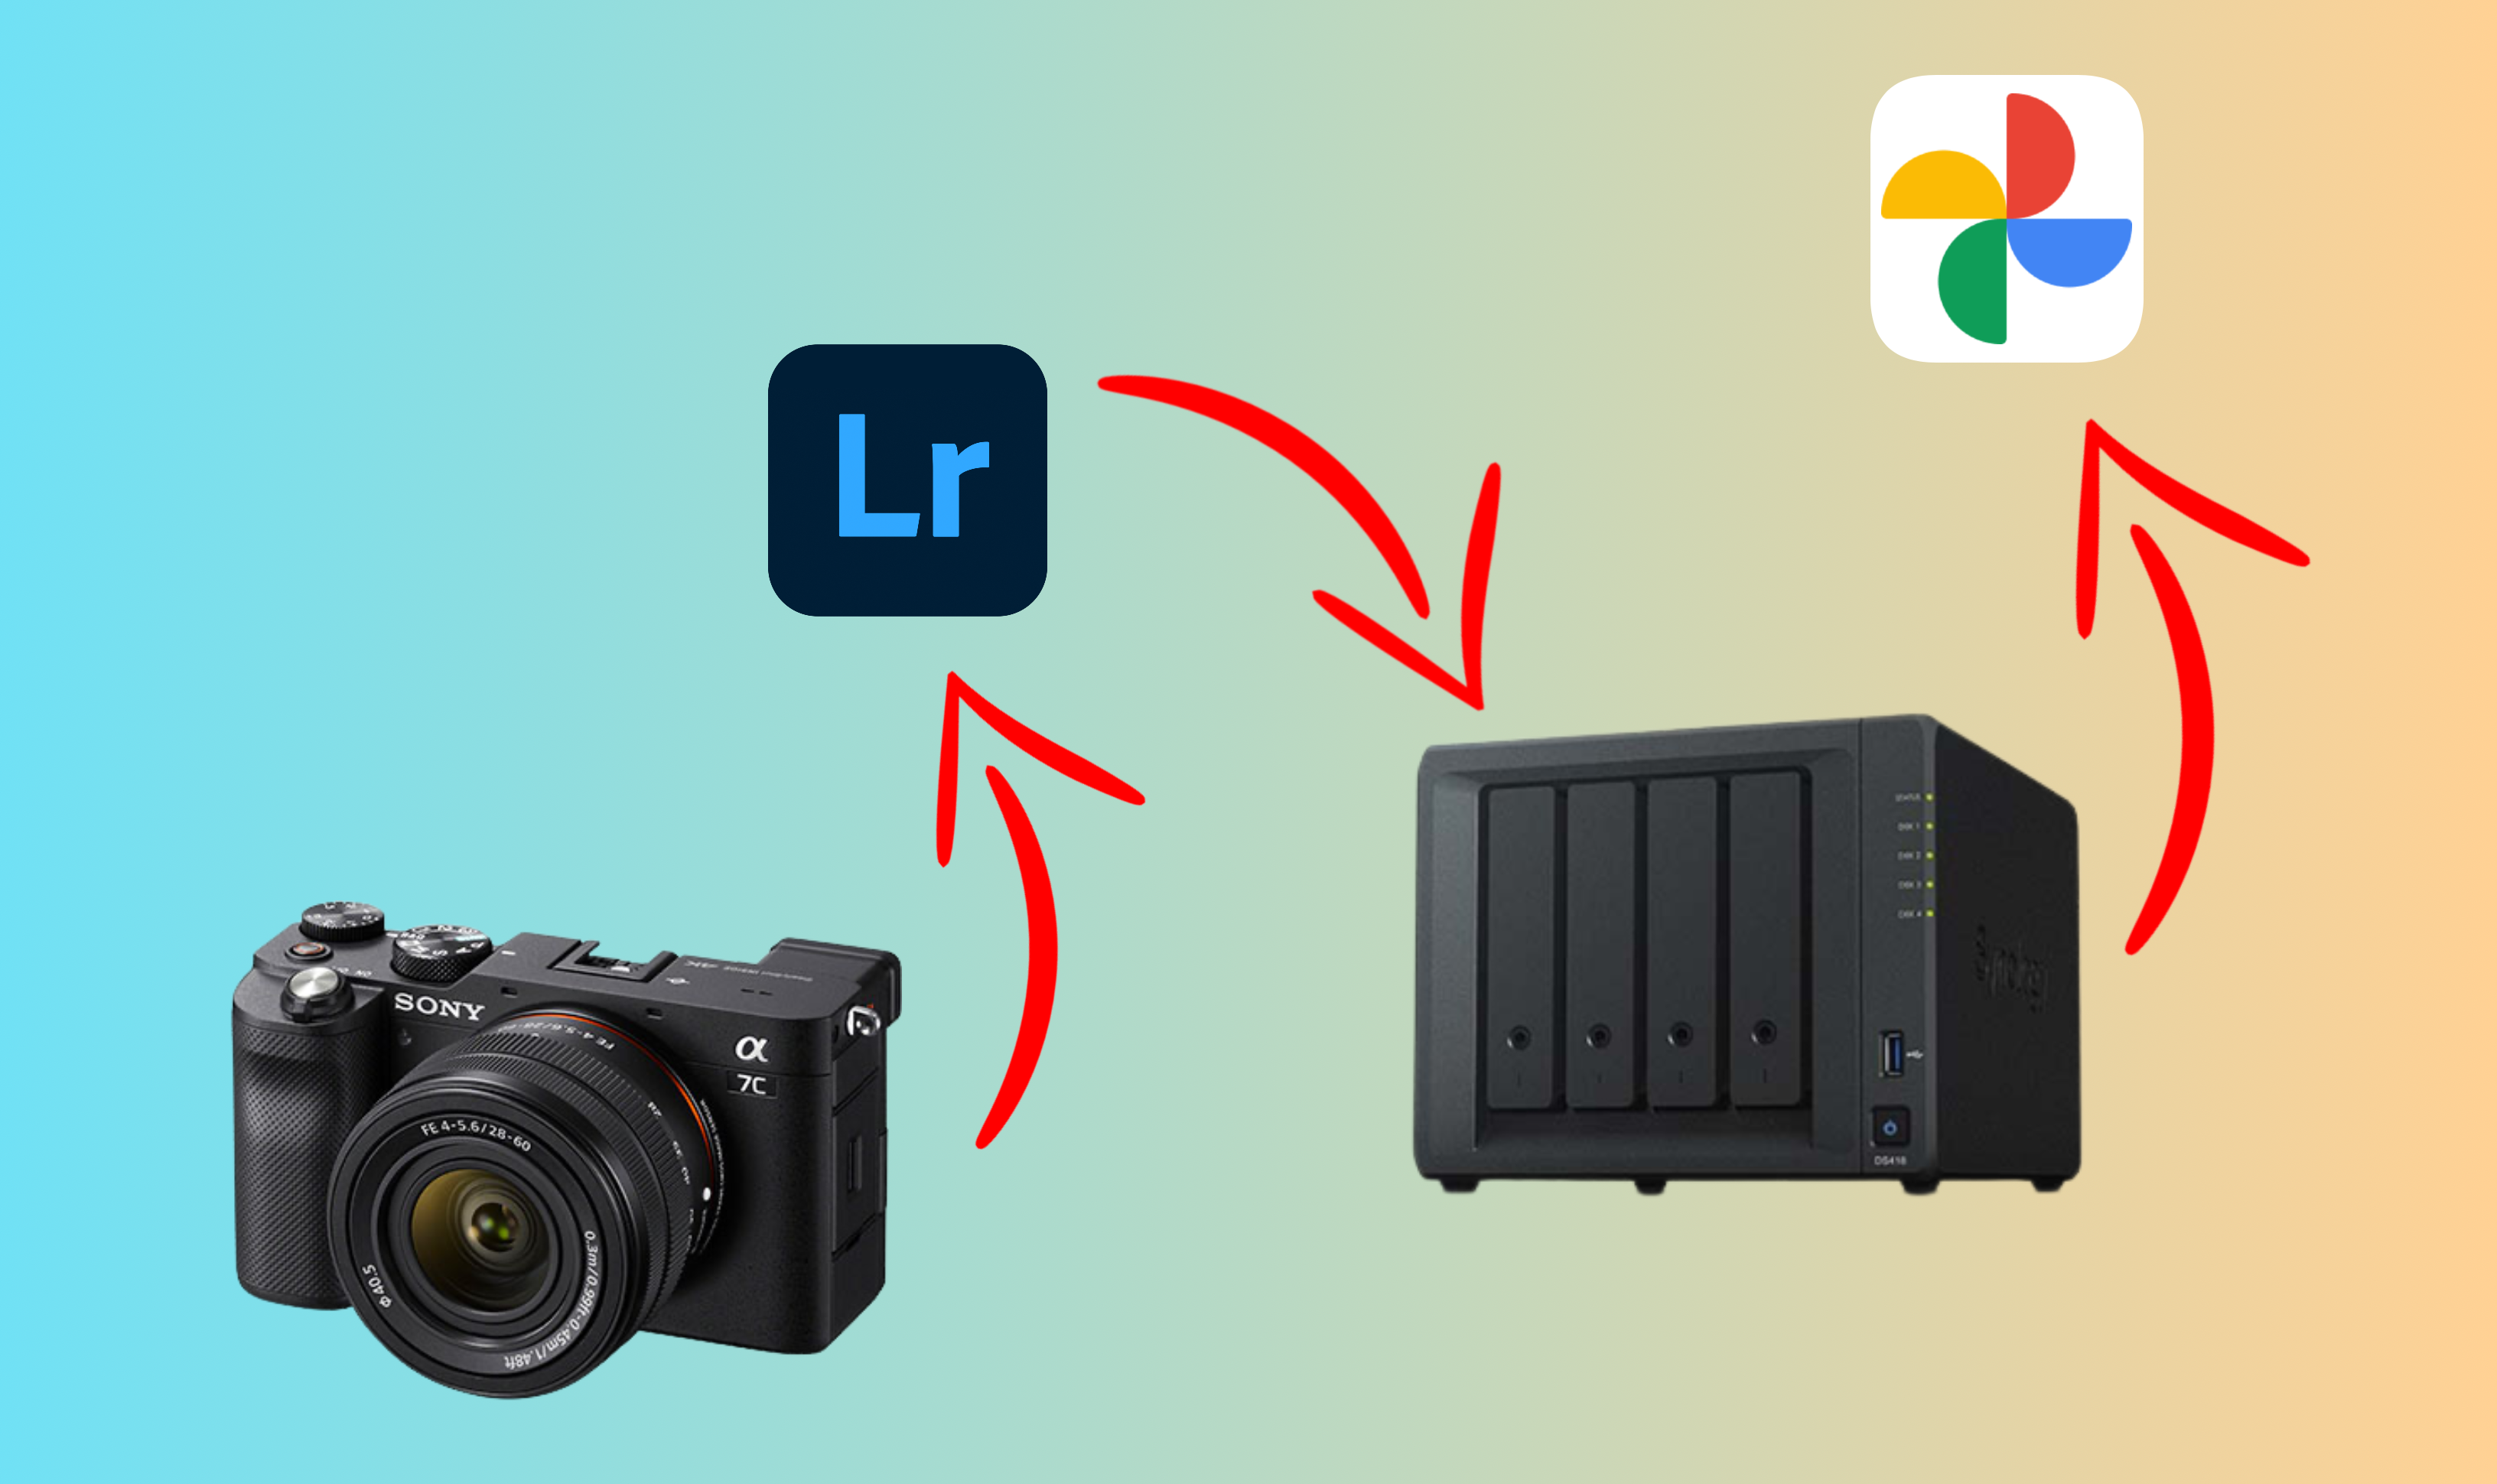
Synology for all storage
As I’ve discussed before, I use a Network Attached Storage (NAS) for most of my storage needs. It really is one of the best purchases I’ve ever made, and so easy to expand whenever I get low on capacity. I just buy one or two new hard drives with higher capacity and replace my old ones. The NAS does all the work of restoring and rebuilding the volume and within a couple of hours – or days if you really have a LOT of data – everything is ready.
The NAS I chose was the Synology DS918+, the top of line 4-bay NAS from Synology at the time I got it. As of my writing of this post I have two 3 TB drives and two 4 TB drives in an SHR volume, giving me a total of 9.6 TB of usable capacity.
Having all my photos and videos in one location makes it easy for me to perform backups and expand capacity whenever needed. Furthermore, a NAS that is online 24/7 allows me to remotely access it if I need to look for and download old photos wherever I am. Remote access also enables me to upload photos when I’m on trips and not physically present in my network. This is not the most efficient workflow – and I’ll explain more why later, but works in an emergency.
On my main Synology volume I have two shares where I keep all my media:
- Photos
- Videos
And within each of them I have individual events or photoshoots separated per folder. You could split per dates, but this is how I manage it best.
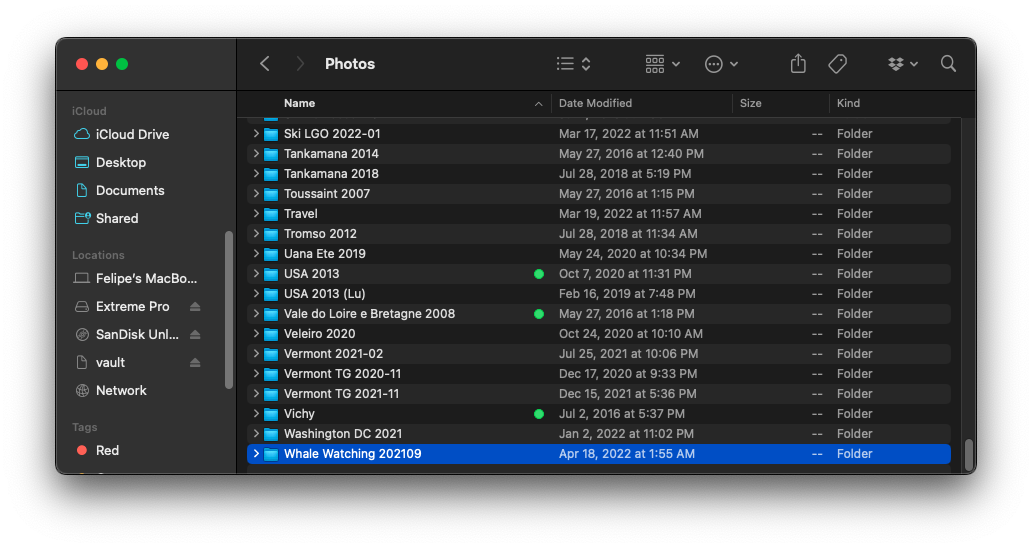
My main Photos share
Lightroom for all management
Regarding photo management, I really only use Lightroom. I’m a long time user and have kept it through lows and highs. I know it’s not perfect, and it can be really slow at times, especially when editing photos through the network, but I like the organizational features, and I’m really happy with the editing capabilities. Furthermore, I’m a subscriber of their Photography Plan and use Lightroom Classic on my computer, with some uses of Lightroom CC on my iPad and iPhone when the moment asks for it.
In fact, I’ve been digging Lightroom for iPad a lot this past year and love it for photo culling. I’m also doing a bit of editing there mostly because it is a consistent screen and I don’t trust my current monitor, as I got a really cheap one for business school.
As I mentioned on the previous section, all my media is stored in my NAS. Yes, that means Lightroom becomes even slower than it already usually is. But it gives me peace of mind. Plus, I’m not in a hurry to get things done. If I was doing this professionally, my choices would probably be different, but this works for my amateur photography needs.
Lightroom is not meant to be a network tool, and as such it is not possible to have your catalog files stored in a network share, even if your media is. Many years ago it was possible to have Lightroom’s catalog file in a network share, but even then it was highly ill-advised to do so. On top of it being a speed problem, Photofocus explains the main reason: even if it was possible to open a Lightroom catalog from a NAS up until 2015, Lightroom used to place a lock on the file, preventing simultaneous access to it.
Thus, my main catalog files still live on my laptop. At some point I had the catalog in a Dropbox folder, and later moved it to my Synology Drive folder, benefiting from automatic backup to my NAS. I’ve since moved it out of any cloud style folder. Catalog files consist of thousands of smaller files that get updated every time you make any change to your photos. As such, the Synology Drive software was constantly working through uploading all of these changes to my NAS, sometimes even creating conflicting copies, as the changes were so many and so often. Today, I have my catalog file simply located in my MacBook hard drive, no Dropbox, no NAS, no anything.
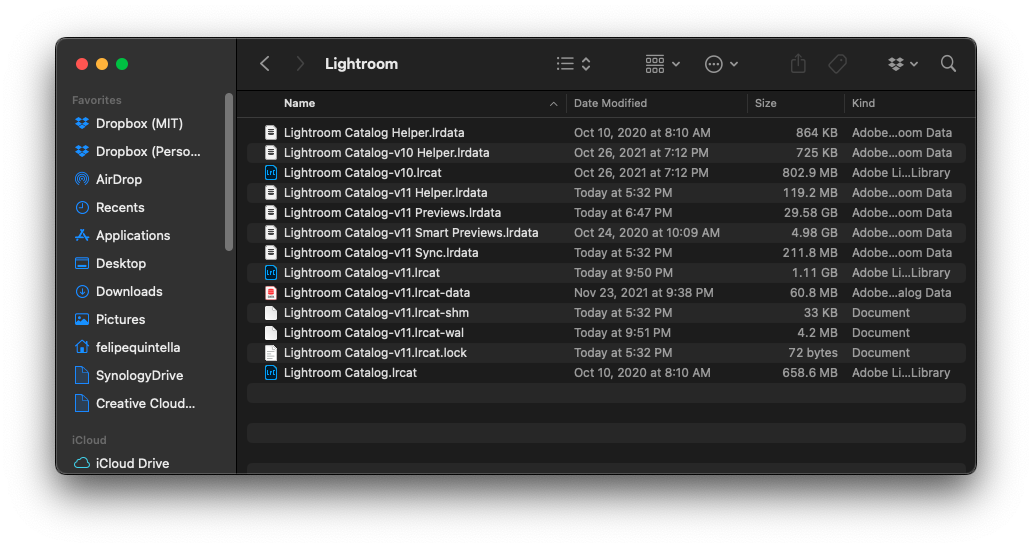
My Lightroom catalog lives on my MacBook hard drive
You might be asking yourself what happens if my laptop is stolen or my drive fails. This is where Catalog Backups come to place. It is really important to maintain regular catalog backups, and not only due to possible catastrophic losses. Lightroom’s catalogs are fragile databases, storing information on everything from photo locations to keywords, edits and compilations. They can easily be corrupted, making your life hell. You won’t lose your photos, but you’ll still lose all the work you’ve put into it, cataloging, culling and editing your photos. Lightroom offers regular catalog backup, and you should really make use of it. I cannot emphasize this enough!
On my case, I do weekly backups, and have Lightroom remind me to do it when I close it. This ensures I’m never more than a week behind, and most often only a day behind. As I don’t use Lightroom that often, whenever I do any work it has usually been more than a week from the previous backup and, when closing the program, I get reminded of the need for a backup and do it. Lastly, to ensure catastrophic hard drive failures won’t hurt me, I have my catalog backups in my Synology Drive folder. They get uploaded to my NAS and backed up to Wasabi through HyperBackup every night.
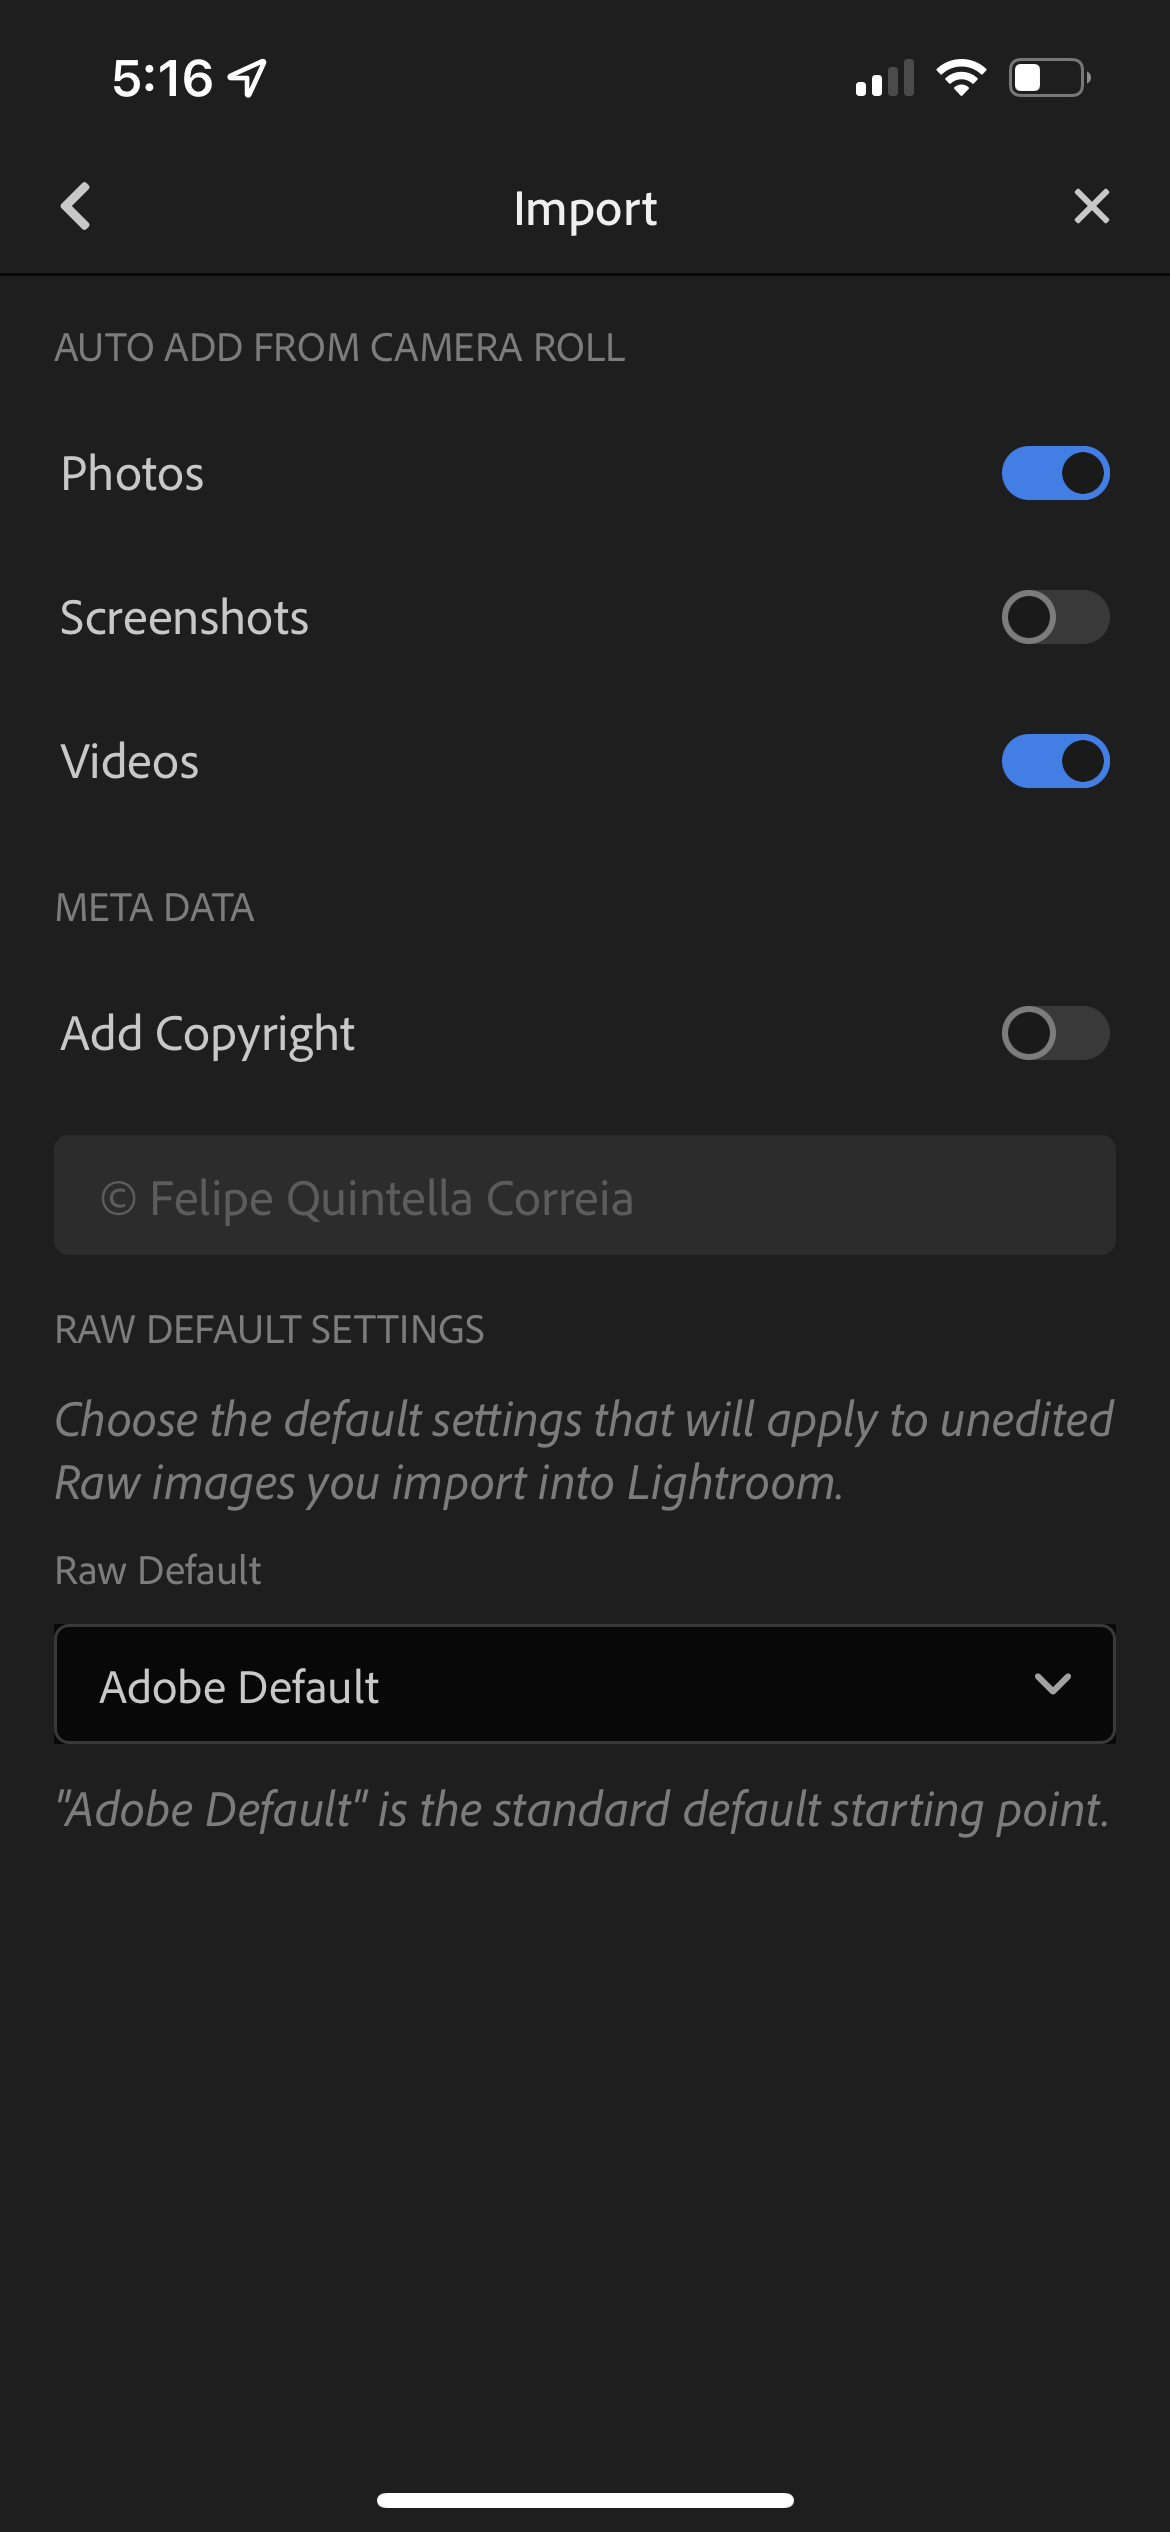
For setting up catalog backups you should go to:
- Catalog Preferences;
- General;
- Backup;
- Choose your desired cadence. In my case, `Once a week, when exiting Lightroom'.
All of these give me enough ease of mind so that I can sleep peacefully at night.
At home workflow
My workflows when I’m at home and traveling are very different. Being it just a stroll around the city or going to a friends house and bringing my camera with me, returning home at the end of the day makes it easier to transfer and store my photos than when I’m on vacation or traveling in another city. So, let’s start with being at home.
I will often go out when a new season starts to take a few pictures of the city and its changing scenery. Having been in Business School for so long as of the time of this post, I’m also constantly going to parties, events, gatherings and whatnot. And of course I’ll bring my camera with me whenever possible – for example, a couple of months ago I went out to watch the Boston Marathon and brought my camera with me. In cases like this I’ll take pictures and videos and come back home.
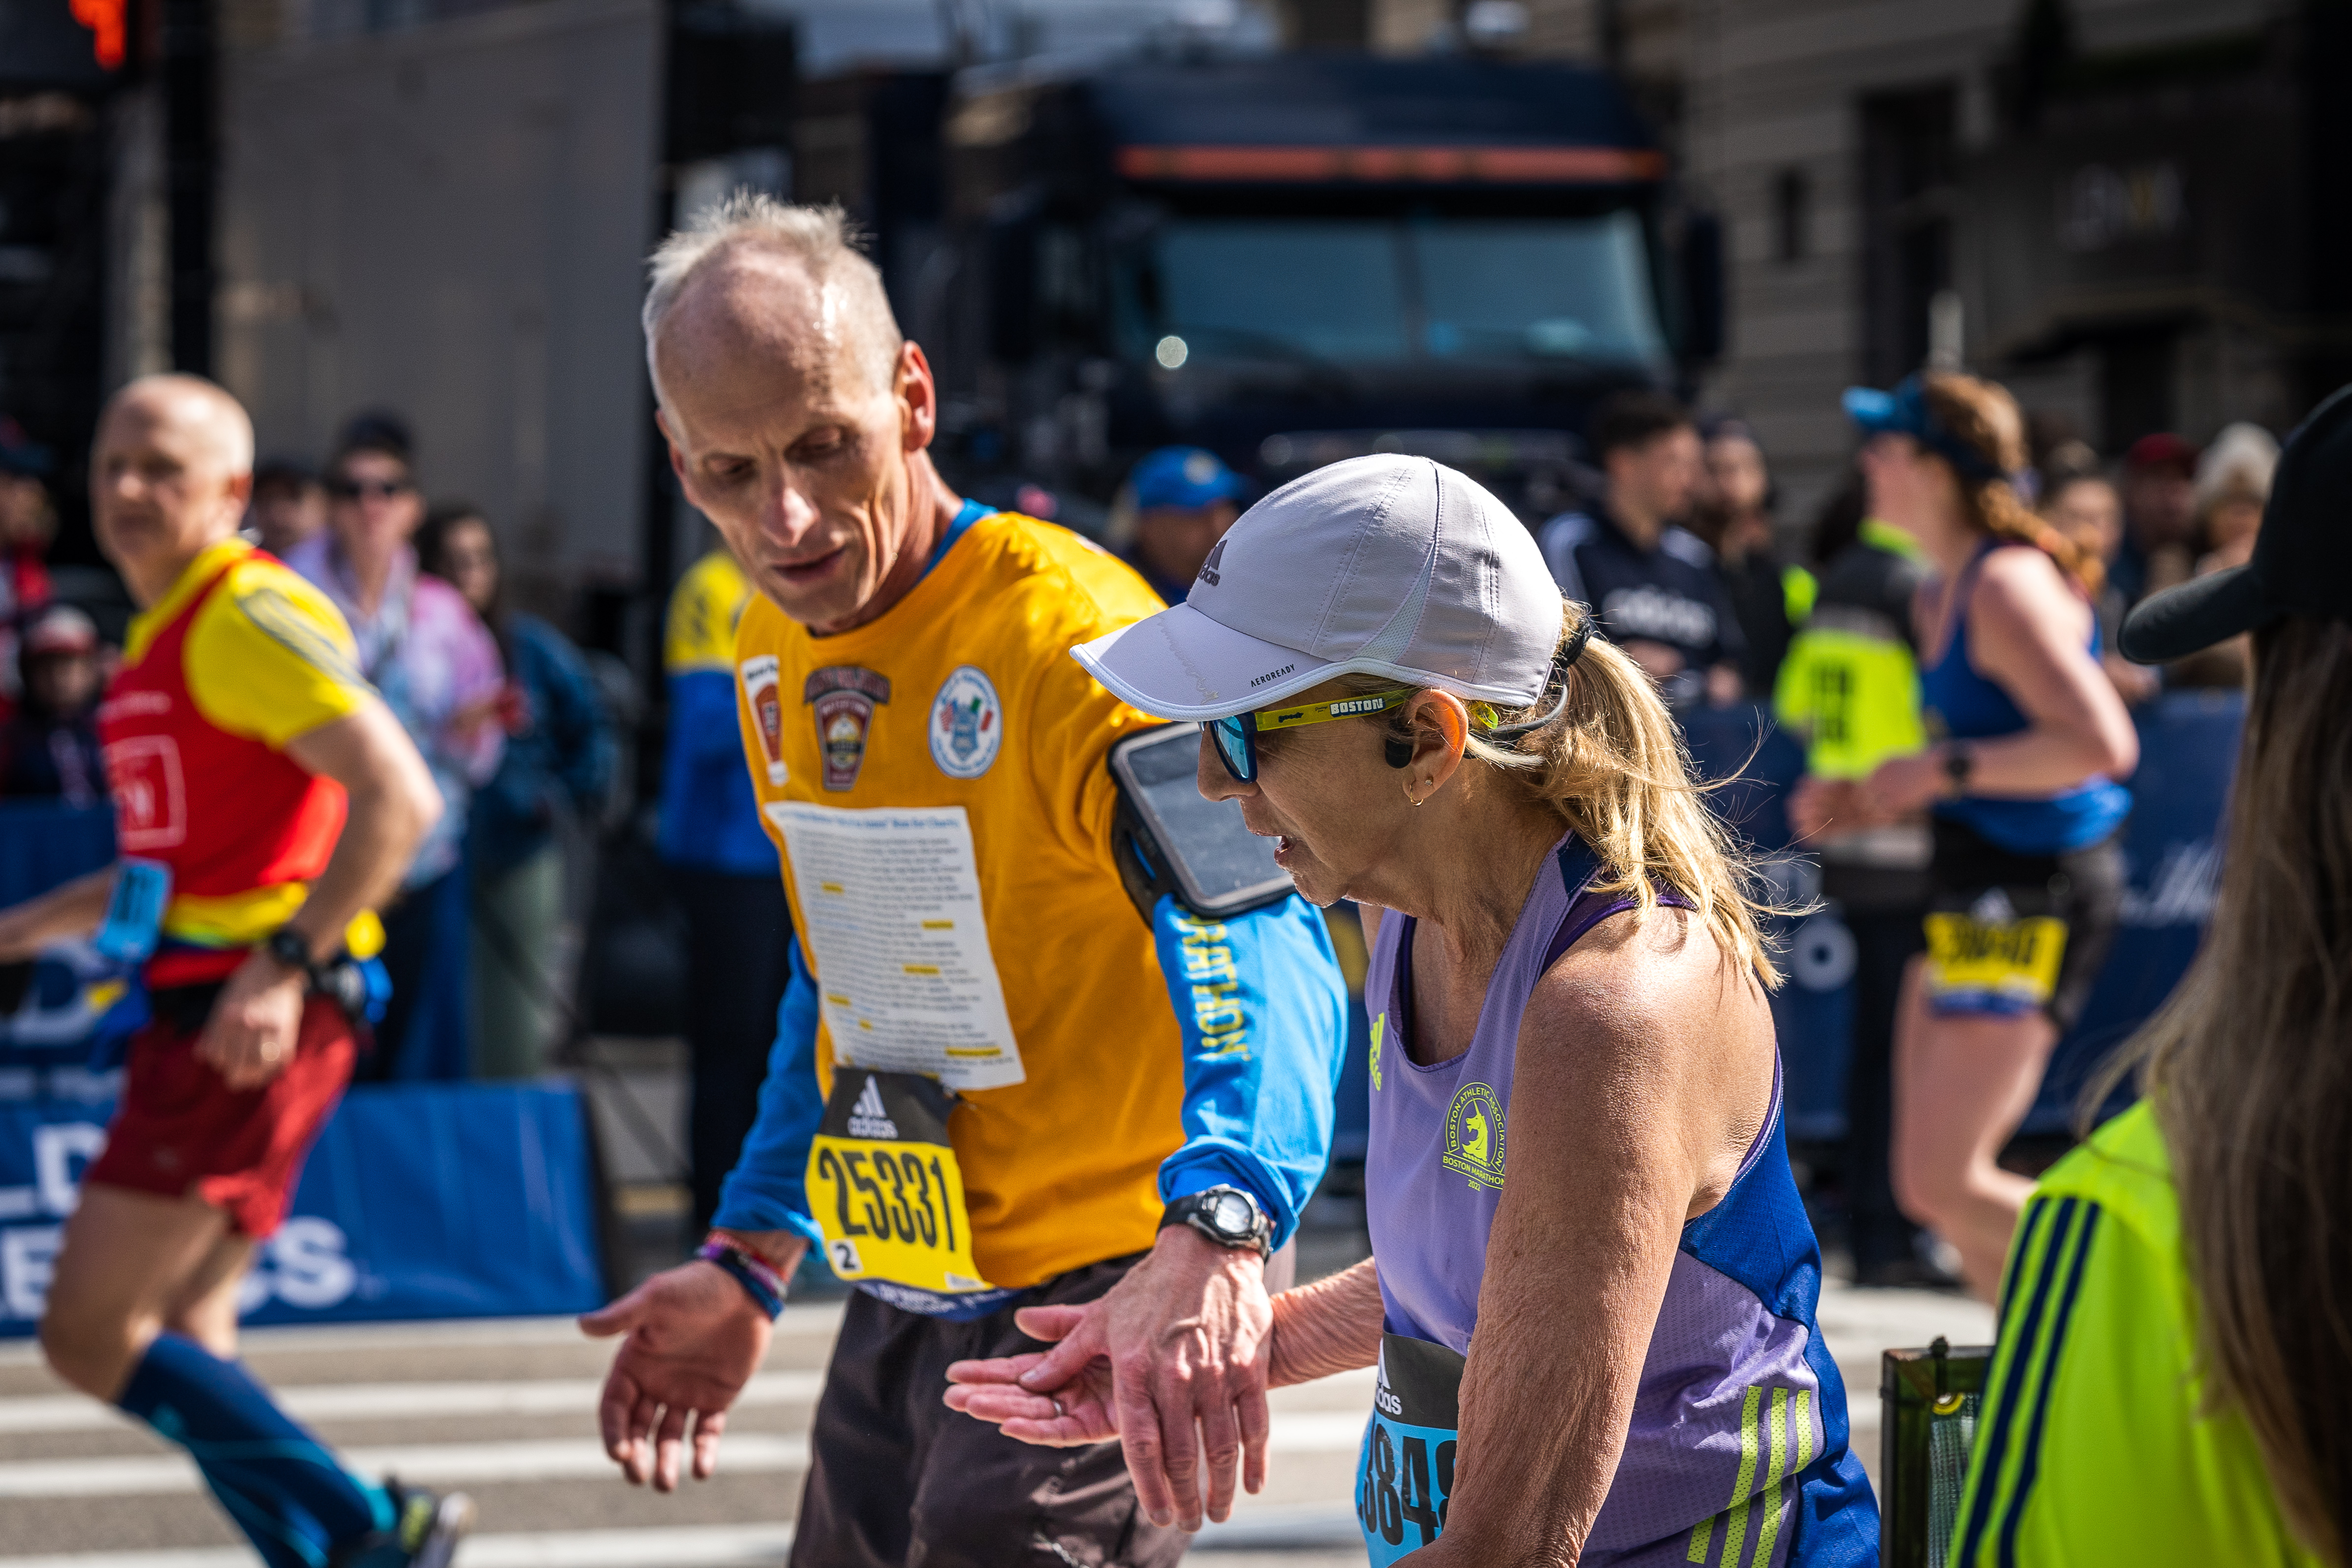
Scenes of compassion at the finish line. This is why I love going out to take photos: capturing moments like this.
Transfer and Lightroom Import
This is where the workflow starts. When at home, I’ll either connect my camera directly to my laptop or just use my SD card reader. Transferring is done straight from within Lightroom. I’ll copy the files from the camera directly into my NAS and import them into Lightroom Classic at the same time.
The settings I use for the import are the following:
- Copy files
- To my Photos folder share in my NAS
- Don’t import suspected duplicates – just to avoid seeing all the photos I’ve already imported but haven’t deleted from the camera
- Make a second copy to – my local hard drive in case something goes wrong before the nightly NAS backup
- Rename files – I rename all my photos to a template I created: `Date (YYYYMMDD)-HourMinuteSecond_Filename'
- Into subfolder – with the name I want to give this event/photoshoot
- Organize `Into one folder'
This way I get all my photos renamed by date and time of the shot, so I can easily sort them by filename if I want, get a backup copy in case something goes wrong and have all files in a single folder for each event. By the next day, Synology’s HyperBackup will have transferred all new files to my offsite storage and I can delete the second copy from my local hard drive.
Culling/Editing
Culling is as important as editing, in my opinion. Here you separate the good from the bad, and can delete the bad to save disk space, if you so want. I’ve tried a couple of different ways to cull my photos, including Colors, Tags, Ratings and else. But nothing has been as effective to me as Flags. Flags are easy, they don’t require a lot of thought or cognitive effort from your brain. They are a single choice from two options – Flag or Not. You glance at the photo and make a decision. Sometimes, if there are too many photos, I will do a pre-selection by rejecting clear losers. In this case, the process is still very cognitively easy, Reject or Not.
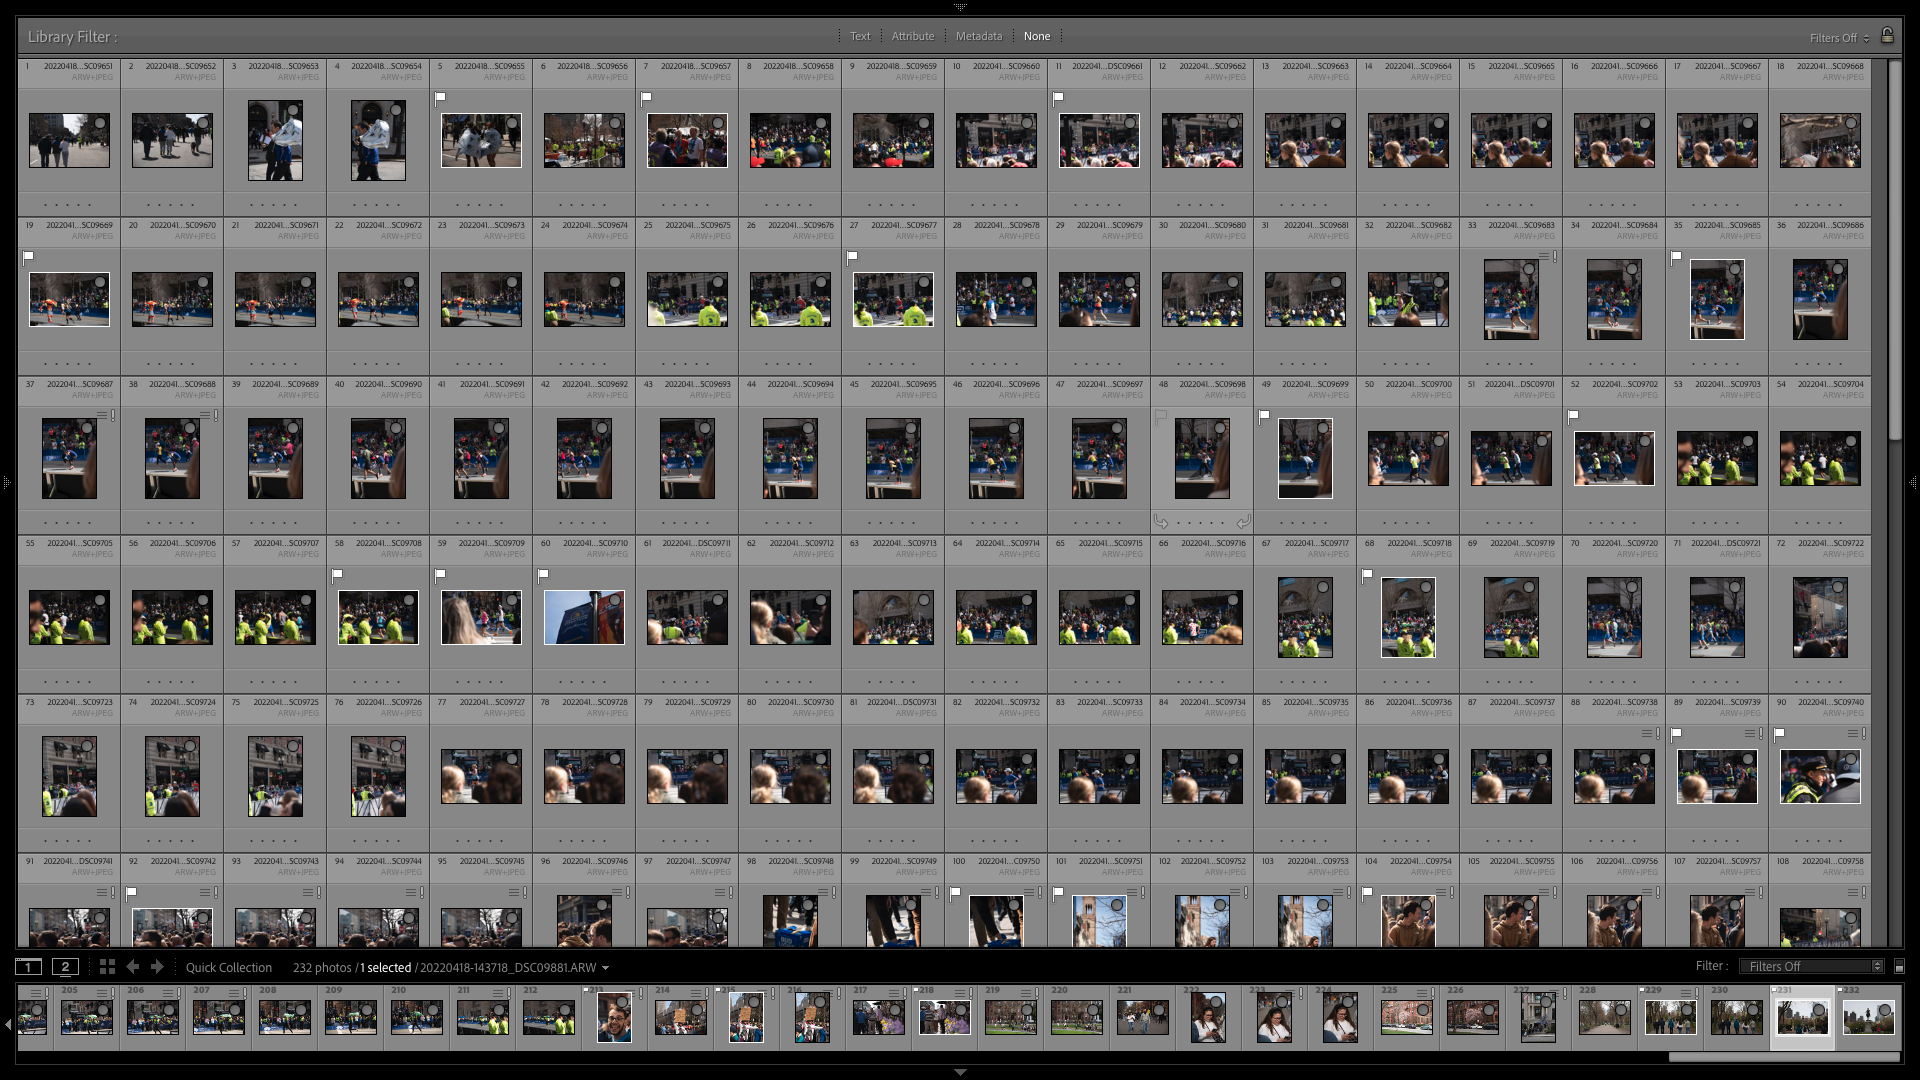
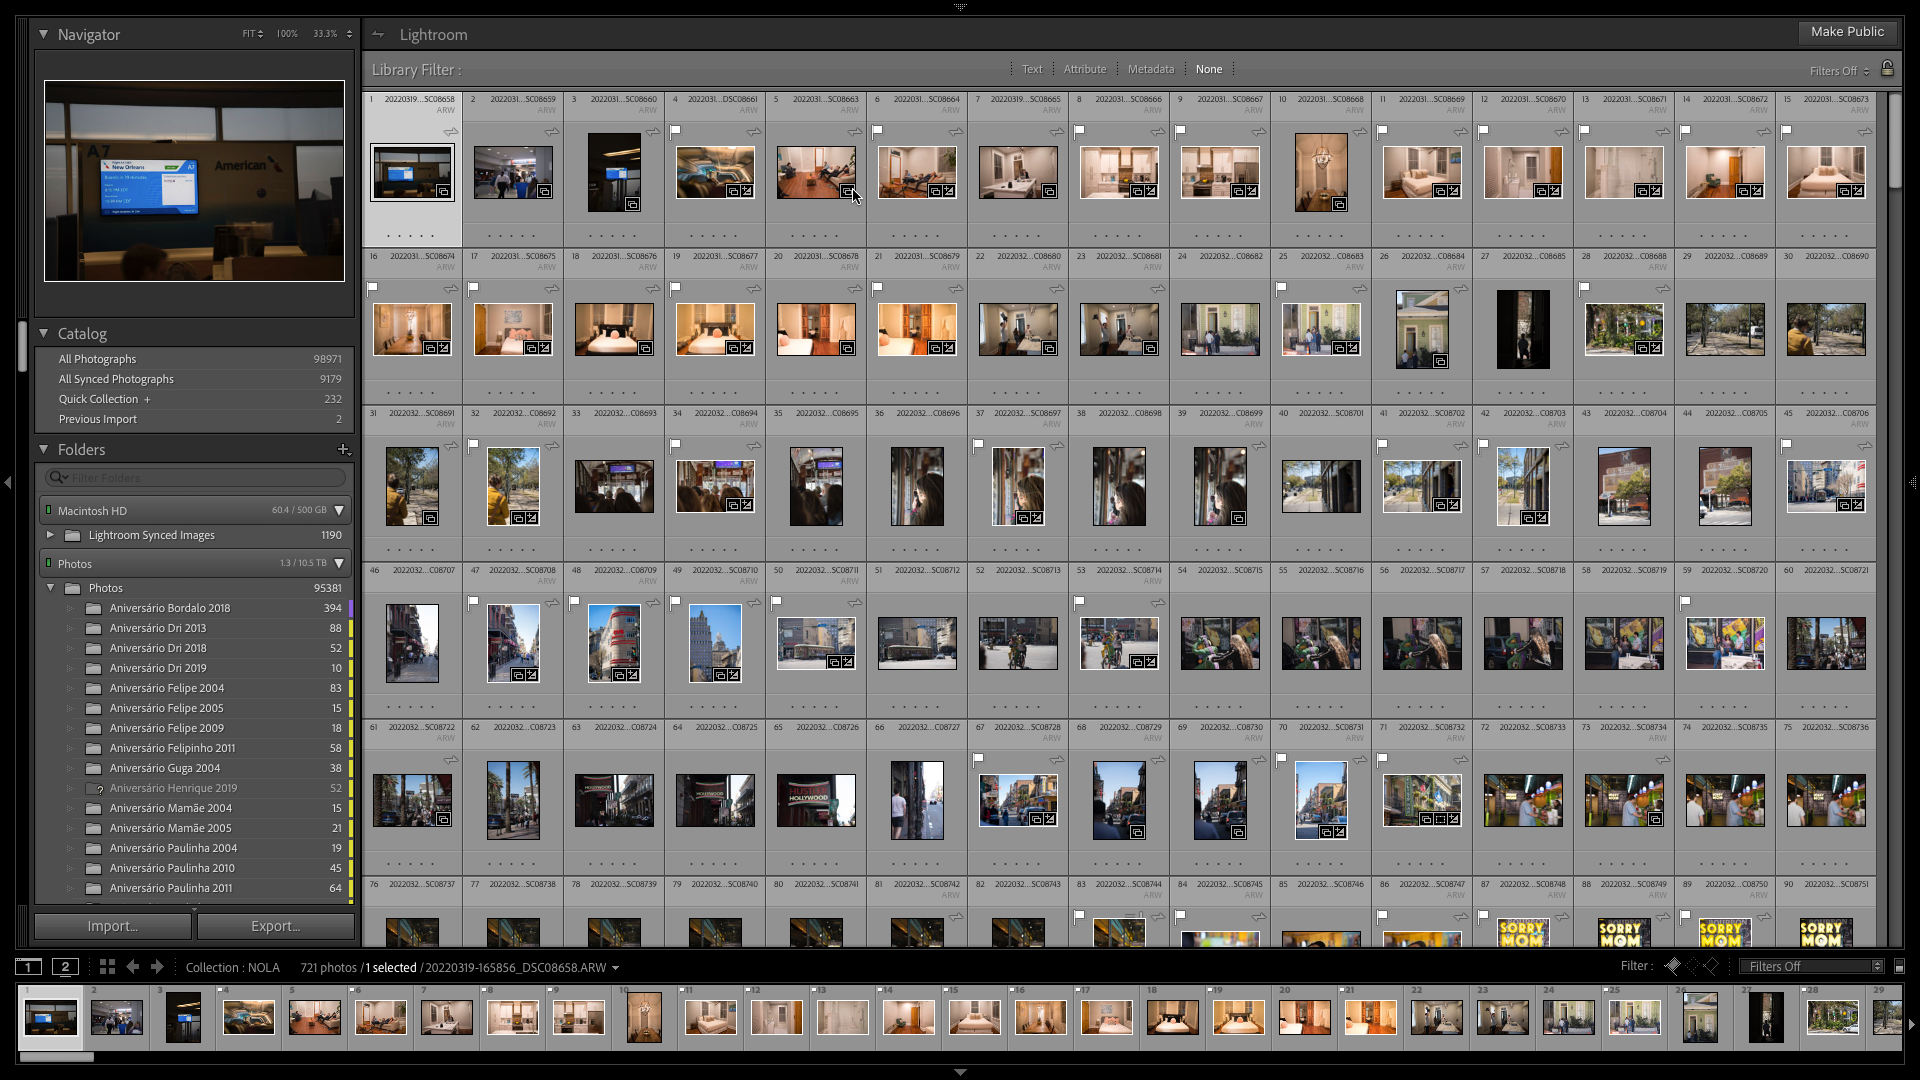
Photo gallery after import
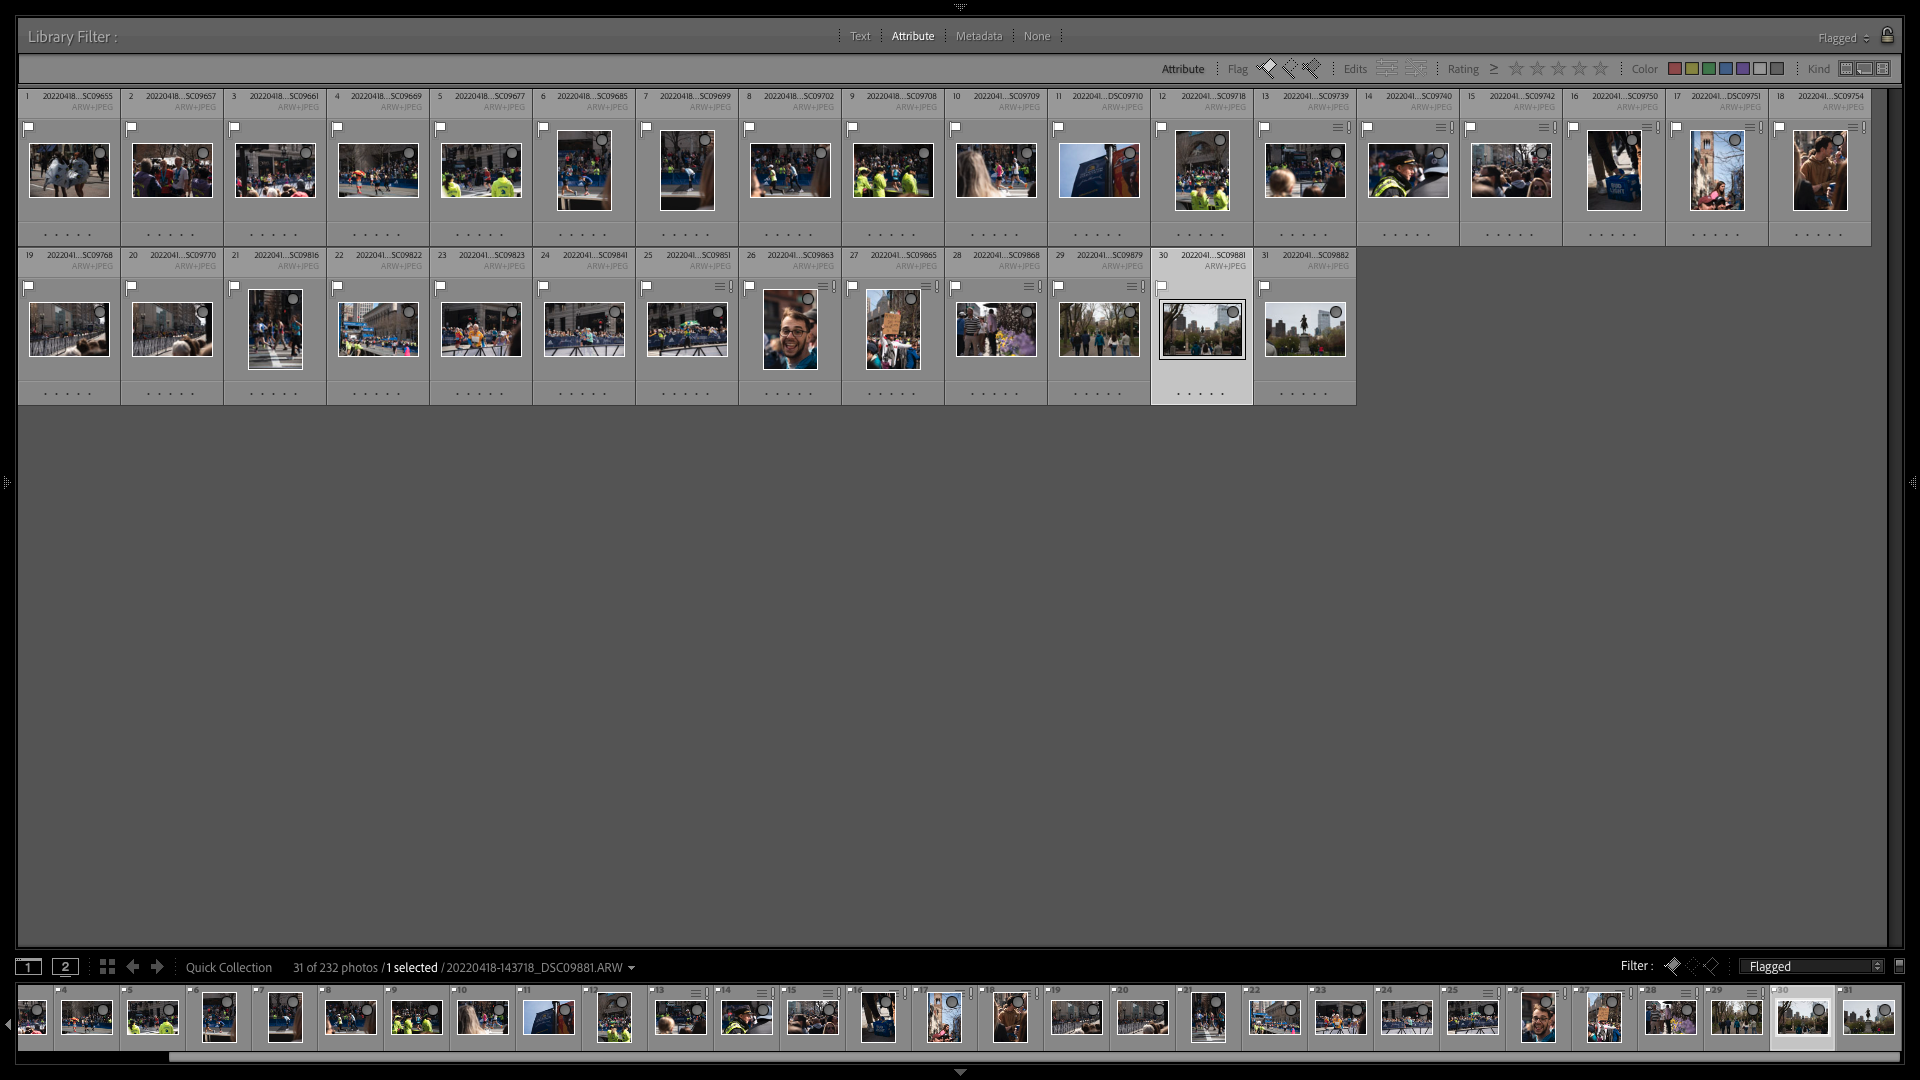
Photo gallery after the culling process, and filtered by Flag
By the end of this process I will often have reduced my photos to about a 1/4 of the original amount. From here, editing takes place. I might star a few favorites, color-tag a couple for use here or to share with friends, but I will eventually do some light editing on all the flagged photos. Mainly Lens Correction, Perspective Transforms and Basic Adjustments, in this order.
My reasoning for these adjustments is the following:
- Lens Correction: I’ll get some lens warping and edge darkening corrected. I’ll always check Enable Profile Corrections and Remove Chromatic Aberrations so that my lenses profile are automatically applied.
- Perspective Transforms: This will help me get a more level shot and correct any tilting distortions. If the photo looks better without it or has intentional tilt, I’ll remove and stay with the original.
- Basic Adjustments: I will always start with Auto, and then tweak the Highlights, Shadows, Whites and Blacks to my taste. I will also play with the White Balance in case the scene was too complex for the camera and tweak Vibrance, Contrast and Exposure when needed.
I am also starting to experiment with setting a Camera Profile before I start editing, but I’m still checking how that will influence my editing and final results. Andrew Gibson has a great article about it on Petapixel.
Sharing
Most of the time when I’m shooting at home I have no need to share the final photos with anyone. It’s usually for my own sake and, to be honest, it might take me weeks to even look at the photos after I’ve transferred them.
On the few occasions I was shooting a party, barbecue or whatever event with friends, I’ll make sure to export the photos and upload to a shared Google Photos album. It’s still my best options today, as my home internet upload speed is not great for me to serve a shared album straight from Synology. I also LOVE Google Photos' AI. It’s so good at finding things through search, recognizing people, creating mini albums and recollections.
Travel workflow
So, traveling. That’s when I love to photograph the most. I’ll go on walking around with my big backpack, carrying lenses and camera, batteries and SD cards. I have my Peak Design Capture Clip attached to my backpack strap and my camera always ready. I’ll take anything from 100 to 300 photos a day on a good trip, and that means a lot of material to go through.
Photography
I really enjoy landscape and street photography, and I’ve been using two fixed lenses for a while, a Sony 24mm f/1.4 and a Sigma 85mm f/1.4. They are expensive lenses, but I love the f/1.4 flexibility at night, and specially enjoy the 85mm perspective for travel.
I have a few SD cards available, mostly because I accumulated them over the years:
- 64GB Sony SDXC II – this is my main card, and I’ll only swap it if I can’t offload the content
- 2x 32GB Lexar Professional SDHC II – these are my secondary cards, and I’ll turn over to them next
- 64GB Sony Professional SDXC I
- 32GB Kingston SDHC
It is rare that I have to use any card other than my main one, but it can happen every once in a while. Usually I’ll keep to that one card shooting during the day and transfer the contents somewhere else once I get back to my hotel at night.
Transfer and Lightroom Import
Once I get to my hotel or AirBNB at night, I’ll start to transfer the days' photos – or the past couple of days if I skipped any. The process will depend a bit on what I brought with me. Ideally, I’ll have my MacBook Pro, my iPad and my 2TB external SSD drive. Sometimes I may be traveling light and only have my iPad and external drive, or not even that.
- Laptop and external drive: My laptop does not have a lot of hard drive space. I have a total of 256GB, of which usually only around 50 to 70GB are available., which is not enough for a full trip. Because of that, I have recently purchased a 2TB external SSD from SanDisk, the Extreme Pro Portable drive. SSDs have come a long way, and this one is tiny, rugged, affordable and superfast. I can store it anywhere, really, and have it with me whenever I need. It’s not Thunderbolt, but it has a next-generation USB-C capable of up to 2000MB/s transfers. When home at night, I will plug the camera and drive to my MacBook Pro and transfer all the SD card contents to the drive. If I have the time to spare, I will also load up Lightroom and import all the photos to my Library, but leave them all in my external drive for now. This can be achieved by selecting ‘Add’ instead of ‘Copy’ on the Import screen. Another great advantage of using an external SSD of this type is that the photos are lightning fast to load and to edit! I might even adopt moving files to this drive whenever doing a large editing project, even if they are already on my NAS.
- iPad Pro: When I don’t have my laptop with me, I’ll connect my camera to my iPad, via USB-C and transfer the contents to it. This can be done in two ways, through the Files app or directly on Lightroom CC. On these cases I’ll usually transfer the photos straight into Lightroom, and have it backup everything to Adobe Cloud. The app does a good job and uploads the entire RAW files to the cloud, so I can later download them on my computer, which is the main thing I need.
I will often not delete the photos from the card straight away, and keep on shooting until it is full. I will try to keep these two copies of the photos for backup reasons, and so I will change to one of my other cards for the rest of the trip when the ones in use get full. Deleting photos will only happen if all cards are full, and I have already transferred photos to my drive or iPad. It is rare, though, that I will take more than 200GB of photos on a trip, unless it is a multi-week one.
At this point, my photos are transferred and in Lightroom in some way.
Culling/Editing
On trips, I have learned that culling is a lot easier if done on a daily basis. After the photos are transferred to Lightroom, I’ll do a quick culling the next morning, before going out
The process is very similar to the one I described above. I’ll flag the photos I like, and that will usually reduce my gallery to about a 1/4 of the original size. If the hotel wifi is good enough, I might setup a trip Collection and mark it to Sync with Adobe Cloud, so I can cull on my iPad.
For when I import using only my iPad, I will take a very similar approach, flagging the photos I want to keep by swiping up on the left side of the screen.
If I want to post something or share with friends, I can do some light editing right there and then as well. The process is, again, very similar to the one at home. I’ll add Lens Correction and Transforms, and add some Basic Adjustments to add back some contrast and recover some highlights and shadows.
The important point here is to process the incoming photos every day, if possible. It reduces the effort and work needed a lot and makes it so much more enjoyable to work with your trip photos later.
Sharing
If the hotel/AirBNB has good internet speeds, I’ll often try to upload my final selection to a Google Photos album shared with the rest of the group. I have had cases, though, when it was impossible. Uploading was gonna take more time than I had of trip days, so I will just wait until I’m back home and do it then.
Backup
This is so, so important. Because I am on a trip, somewhere new, and with lots of going to places and getting on airplanes, problems can happen.
My first approach to backups during trips, as I mentioned before, is to not delete photos from the cards unless I’ve run out of space. Yes, even if I’ve transferred the files to my iPad, Laptop or SSD.
Furthermore, when internet allows for it, I’ll make an offsite copy of the photos. The best way to do this is to VPN into my home network and transfer the files to my NAS. Unfortunately, this is really slow, and not often optimal. I’ll try to leave it transferring from my laptop during the day, when I’m out and about. Another option for offsite backup is to transfer it to an Amazon S3 storage or a cloud provider of some sort.
Back at home
At this point, I should have everything almost done. Photos are transferred, culled, mostly edited. When I get home, I plug my external SSD to my laptop, connect to my home network, and transfer the full trip folder from my SSD to my NAS. I’ll usually do this from Lightroom itself, but you can also copy it through your OS and then tell Lightroom where the folder has moved to.
If the original transfer was done to my iPad, the process is slightly different. I’ll have to wait until my Lightroom Classic downloads all photos from Adobe Cloud, and then move them to a new location in my NAS share, also from within Lightroom itself.
Once the photos are in my Synology share, HyperBackup will take care of sending it to my Wasabi account, and photos will be safe.
From here, I will further edit, select photos for publication, star and rate some if I feel like so, but the hard part is done.
Phone Photography
As the famous photographer Chase Jarvis once said, “the best camera is the one that’s with you”. Our smartphones are an incredible source of in-the-moment photography. I’ll take thousands of photos every year, and even during trips I might shoot a few with my phone if I don’t have my main camera with me or within easy reach.
I like to have all my photo library on the same place, and this place is Lightroom, you guessed right. So, how do I move my iPhone photos to Lightroom and my NAS?
Transfer and Lightroom Import
The good news is that the Lightroom iPhone app is pretty good. What I do is having Auto Add enabled to a collection, and it does all the import and upload work for me. Another setting to change is to include Videos for the Auto Add options, so that the videos you shoot are also uploaded. The one downside from this approach is that Live Photos are not transferred. You get the .heic file from your iPhone photos, and any videos you shot as a .mov. I’m not a big enthusiast of the live photos, although I do like them, so no problems for me.
Easy way to import all iPhone photos to Lightroom!
Sync is seamless, also
Don't forget to turn on Video auto-add as well
When Lightroom is then open on my computer, it will download whatever photos and videos got imported on your iPhone and keep them at a folder you define in your laptop drive. I will usually leave it like this for months until I eventually go through them. My process here is to try to categorize my phone photos at least once a year. Whatever fits to an existing folder/event will get move to that folder, and whatever can’t really be categorized will be moved to a ‘General’ folder per year. I don’t really cull and edit these, as they come mostly ready from the phone.
All your synced images end up in a folder on your computer
Another thing I do is to have auto upload enabled on my Google Photos app on my phone. Just like the Lightroom app, Google Photos will upload everything and work its AI magic.
Photo Services
So, Lightroom is where I keep all my raw files, categorization, tags, flags, edits, keywords, etc. But what do I do with the finished photos, galleries and collections? I’ve mentioned a bit above, but I’ll go into more detail here.
Lightroom Publish Services
One of the most underrated features of Lightroom, in my opinion, are Publish Services. Not a lot of people talk about it, but they are a great way to maintain a collection of photos published and updated. There are many publishing services built-in to Lightroom, including a Flickr and a Smugmug services, and many more available online. I’ll give a special shoutout to a long time Lightroom plugin maker, Jeffrey Friedl. He has made dozens of Lightroom Plugins available, including a lot of publishing services.
I have previously used the stock Smugmug publishing service, but currently take advantage of the Hard Drive publishing service to export carefully curated collections. These are published to another share on my Synology NAS (not the main Photos share), and get added both to the Synology Photos app and to Google Photos as albums.
Google Photos
I mentioned it before, and I’ll say it again: I love Google Photos' AI. They did an incredible job, specially of recognizing people. They find someone you tagged in the background of a photo, partially hidden, and even in videos. It’s amazing. And as long as no other service is able to catch up, I’ll keep on using them.
After I publish a collection from Lightroom, I’ll grab the entire folder and upload it to Google Photos. Unfortunately, there are two things I don’t like: you can’t have it re-create a folder structure as albums from auto-uploading, and it is impossible to update a photo after it has been uploaded.
For the first one, I don’t get why I can’t upload an entire folder and just have it auto-create albums from the folder structure. For the second one, sometimes I have a change of heart and change my editing of certain photos. I’d love to be able to re-upload it to Google Photos and have it be updated, instead of adding a new one. I guess that’s too much to ask for :(
Synology Photos
Synology also has a photo app. It’s called Synology Photos, and it’s becoming quite good, if I can be honest. What I do here is having my publishing folder in Lightroom be the Synology Photos folder. This way, I have them all ready right after publishing, and I can update them by re-publishing whenever I want. I can view them on my phone app or on my computer.
Synology Photos also has a sharing feature, and it’s reasonable. I don’t use it enough because of my home internet upload speed, but would love to be able to just rely on it for sharing with friends and family.
They also have some AI features, such as face recognition, but nowhere near what Google does.
Other ideas
Something else I’ve been thinking about is to try to set up a sort of FTP publishing service that can send my collections to a server, and have galleries be served from this site to friends and family – these would be different from my own published galleries posted here, but only a collection of photos to share. Let’s see if this will eventually work out.